Stream Nginx and PHP FPM logs into AWS cloudwatch

When you have a web application running on AWS instances, you may have control over some cloud monitors of the instances such as Memory Usage, CPU Utilization or even metrics related to storage space. But :

  • What if you want to have your nginx and PHP FPM logs steamed on AWS?
  • You want to set up a cloudwatch alarm if nginx throws an error?
  • You have an autoscaling setup and you want to steam nginx logs of all servers at a central log group on cloudwatch?
  • You do not want to incorporate any 3rd party monitoring tool and want to stick to AWS?
  • Last but not the least, you want it to be cost effective as logs are going to pile up as time goes?

Well, this is all possible now! Let's find out how...

AWS Cloudwatch Agent :

The first and very basic question comes to mind when streaming any custom log file into AWS cloudwatch is : How I am going to stream the logs continously to AWS cloudwatch The answer is using AWS Cloudwatch Agent

On a broader level, once you install AWS Cloudwatch Agent on your EC2 instance, it's going to have a service called awslogs available for you. This service is responsible for streaming any log file you wish to track on AWS cloudwatch. This service will take care of how to push the logs, how much log buffer to push at a time, how much kbs of data to push at a time and so on.

As any unix service would have, the awslogs service also has very handy configuration file using which you can tweak the above parameters which contribute to pushing the log stream into AWS cloudwatch.

Giving permissions to push to cloudwatch :

When we have the AWS Cloudwatch agent installed and the awslogs service running, you will expect the log streaming on AWS cloudwatch inside AWS region you specified. But, it will not work directly.

This is because, the instance should have permission to push logs into cloudwatch. For this we will create a new policy called AWS-cloudwatch-agent-policy.

  1. Login to AWS Console and go to IAM service.
  2. Go to Policies from the L.H.S. menu
  3. Click on Create Policy
  4. A visual editor for policy will be shown. But we are going to save time here. Click on the json tab and enter following json in there :
{
    "Version": "2012-10-17",
    "Statement": [
        {
            "Effect": "Allow",
            "Action": [
                "logs:CreateLogGroup",
                "logs:CreateLogStream",
                "logs:PutLogEvents",
                "logs:DescribeLogStreams"
            ],
            "Resource": [
                "arn:aws:logs:*:*:*"
            ],
            "Condition": {
                "StringEquals": {
                    "aws:RequestedRegion": "xx-xxxx-x"
                }
            }
        }
    ]
}

Make sure you replace xx-xxxx-x with the region you want to steam logs into. e.g. us-west-1 5. Click on Review Policy 6. Give Name as AWS-cloudwatch-agent-policy. If you want to be specific(which I would recommend), add the region name in there e.g. AWS-cloudwatch-agent-policy-us-west-1 7. Give Description and click on Create Policy

Now, we have the policy ready. We need to attach this policy to an IAM User or IAM Role so that EC2 instance can stream logs into AWS cloudwatch. There are 2 ways to do it :

A. If your EC2 instance is having an instance IAM role attached to it, then simply attach this policy to that role. You can find this by going into EC2 instances section and looking for instance property called IAM Role.

OR

B. If you do not have any IAM role attached to your instance, then create a new IAM user with name AWS-cloudwatch-agent-user with ONLY programatic access enabled. Then attach the policy we created above to this user. Make sure you save the Access Keys and Secret Access Keys for this user. We will need it shortly.

Installing the agent :

Now that we have the permissions sorted out, let's install AWS cloudwatch agent, which is the easiest task to do. I am using an ubuntu EC2 instance so I will follow the steps relevent to it in this article. If you are using any other operating systems, feel free to visit the installation documentation

  1. SSH into your ubuntu EC2 instance
  2. Run following commands :
# Switch to root user
sudo -s
# Update the packages
apt-get update -y
# Download the ubuntu cloudwatch agent setup file
cd /root
curl https://s3.amazonaws.com/aws-cloudwatch/downloads/latest/awslogs-agent-setup.py -O
# Install the cloudwatch agent
# Make sure you replace xx-xxxx-x with your region e.g. us-west-1
sudo python ./awslogs-agent-setup.py --region=xx-xxxx-x
  1. Once you run the awslogs-agent-setup.py, it will ask you couple of questions in the prompt like below :

When it will ask for AWS Access Key ID & AWS Secret Access Key, if you have chosen the option A in previous section which is using IAM Role of the instance, then press continue(enter) without anything. If you have chosen the option B which is using an IAM User with programatic access, add the AWS Access Key ID & AWS Secret Access Key of that user and then proceed with the prompt.

On the remaining prompt, just follow what we have below. We will just start with basic bare bones because, we are going to update these settings from config file in next step.

Step 1 of 5: Installing pip ...libyaml-dev does not exist in system DONE

Step 2 of 5: Downloading the latest CloudWatch Logs agent bits ... DONE

Step 3 of 5: Configuring AWS CLI ...
AWS Access Key ID [None]:
AWS Secret Access Key [None]:
Default region name [us-west-1]:
Default output format [None]:

Step 4 of 5: Configuring the CloudWatch Logs Agent ...
Path of log file to upload [/var/log/syslog]:
Destination Log Group name [/var/log/syslog]:

Choose Log Stream name:
  1. Use EC2 instance id.
  2. Use hostname.
  3. Custom.
Enter choice [1]: 1

Choose Log Event timestamp format:
  1. %b %d %H:%M:%S    (Dec 31 23:59:59)
  2. %d/%b/%Y:%H:%M:%S (10/Oct/2000:13:55:36)
  3. %Y-%m-%d %H:%M:%S (2008-09-08 11:52:54)
  4. Custom
Enter choice [1]: 3

Choose initial position of upload:
  1. From start of file.
  2. From end of file.
Enter choice [1]: 2
More log files to configure? [Y]: N

Step 5 of 5: Setting up agent as a daemon ...DONE


------------------------------------------------------
- Configuration file successfully saved at: /var/awslogs/etc/awslogs.conf
- You can begin accessing new log events after a few moments at https://console.aws.amazon.com/cloudwatch/home?region=us-west-1#logs:
- You can use 'sudo service awslogs start|stop|status|restart' to control the daemon.
- To see diagnostic information for the CloudWatch Logs Agent, see /var/log/awslogs.log
- You can rerun interactive setup using 'sudo python ./awslogs-agent-setup.py --region us-west-1 --only-generate-config'

Testing the initial setup :

Let's first check if the awslogs service is running :

sudo service awslogs status

This should show as active.

Now let's see if our instance is streaming anything :

sudo tail -f /var/log/awslogs.log

You should either see something like cwlogs.push.publisher which is publishing log successfully. If you have any issue with permissions, you should see the error here.

If everything is working, you should see a log group called /var/log/syslog when you visit https://console.aws.amazon.com/cloudwatch/home?region=xx-xxxx-x#logs: where xx-xxxx-x is your AWS region. If you click on the log group, you should see syslogs streaming in there. whohooo!

AWS CloudWatch Log Group

AWS CloudWatch Log Stream

Updating the configurations :

Let's first stop the awslogs service for a moment to avoid any syslogs steaming into AWS cloudwatch.

sudo service awslogs stop

Now, we are going to update the configuration file /var/awslogs/etc/awslogs.conf. Edit this file and add below contents in it :

[general]
state_file = /var/awslogs/state/agent-state

[nginx]
file = /var/log/nginx/error.log
log_group_name = nginx_error_logs
log_stream_name = {instance_id}-{hostname}
datetime_format = %b %d %H:%M:%S
initial_position = end_of_file

[phpfpm]
file = /var/log/php7.2-fpm.log
log_group_name = php_fpm_logs
log_stream_name = {instance_id}-{hostname}
datetime_format = %b %d %H:%M:%S
initial_position = end_of_file

Note : Make sure you verify the log file paths as per your server settings.

Let's quickly go over what we have set. The general section is what this service needs to keep its state intact. We have kept it as it is.

The next 2 sections nginx and phpfpm will stream the logs. 1. file : The absolute path of the respective log file 2. log_group_name : Log group which will cloud all similar logs together in AWS cloudwatch 3. log_stream_name : The name of the stream of this log group pushed from an instance 4. datetime_format : The format of logged timestemp 5. initial_position : If you would like to stream the new lines from end of the time or from begining of the file(start_of_file)

If you wish to know more about these options, visit this documentation

Once you save this file, start the awslogs service :

sudo service awslogs start

Finally, you will now see nginx and phpfpm logs steaming into your AWS cloudwtch logs in their respective log groups.

Avoiding streaming of notices and warnings :

At this point in your setup, the awslogs service will stream every log entry from the files you are streaming, no matter if it's an info, notice, warning or an error.

You would not want to pile up your AWS cloudwatch logs with anything which you do not want to track. You can get around this from choosing either of below options :

A. Updating nginx and php fpm service configurations and making sure their log levels are set just to log errors or warnings if you want. B. You can use the awslogs configuration option called multi_line_start_pattern where you can specify a regex which will determine the start of the line.

Setting up a cloudwatch alarm :

Now that we have the nginx and phpfpm logs into AWS cloudwatch, it's time to do the main step. Let's set up an alarm.

  1. Login to AWS Console and go to Cloudwatch service.
  2. Go to Alarms > Alarm from the L.H.S. menu
  3. Click on Create Alarm
  4. Click on Select Metric and search for Log Group, you will see Logs > Log Group Metrics, select that
  5. From LogGroupName, select the log group you want to monitor. You should see nginx_error_logs and php_fpm_logs in the listing, choose any one of them
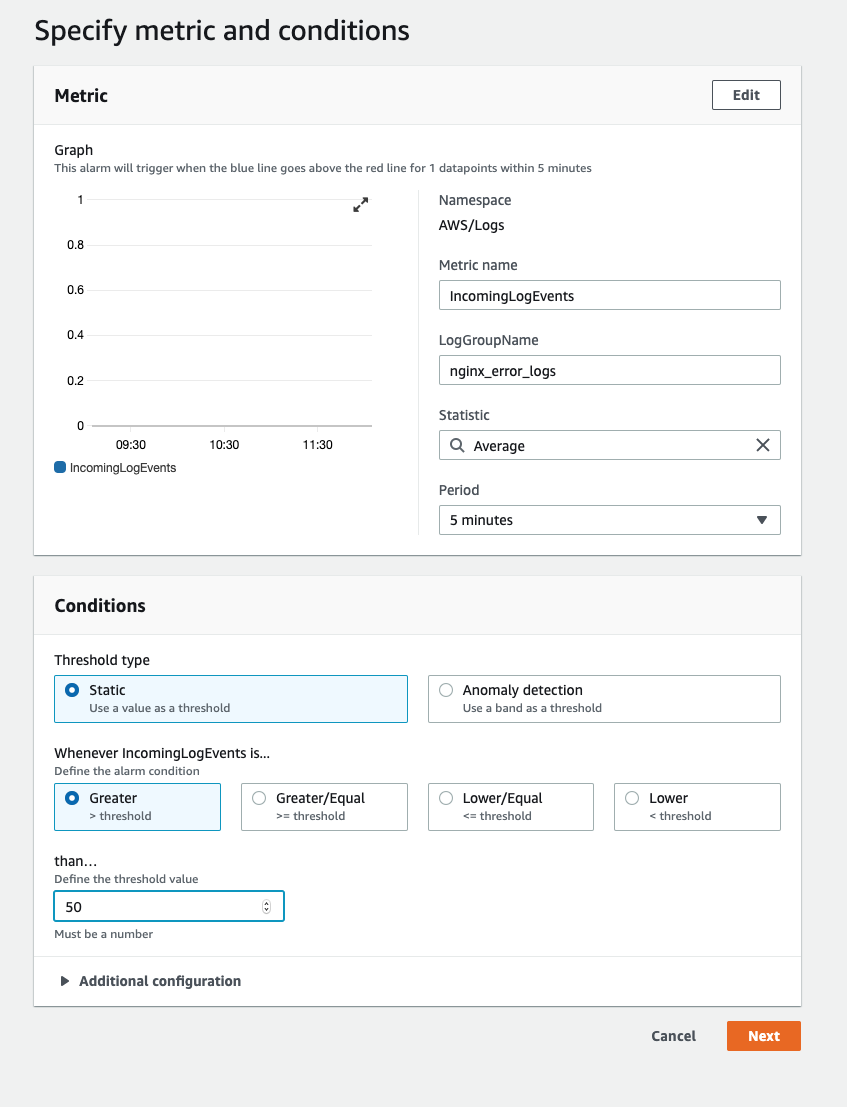
  6. You will see the screen where we specify the alarm conditions. You can set duration of 5 minutes for a static threshold when incoming logs are greater than 50. This means that if for a period of 5 minutes, if any of the log group we select have more than 50 logs, this alarm will go on.

AWS CloudWatch Log Alarm

Pricing :

The AWS cloudwatch agent is free because it's a native service running on your instance. However, what you pay is for the amount of logs you collect, stream and store over AWS cloudwatch. You can check the pricing from their documentation. However, you will find it's much cheaper than most of the 3rd party services providing similar log monitoring service.

Final words :

It's said that you can spread over different cloud providers or service providers to explore more. But in my experience, AWS has these native options which are cost effective, easy and standard to set up.. Plus you have everything in one console, you should definitely give it a try before shifting to a 3rd party solution implementing the same thing.

.....

Read full article

Tags: aws, cloudwatch, agent, stream, nginx, php, fpm, ubuntu, logs, ec2, linux

New AWS EC2 instance connect can save you instance ssh headaches

AWS EC2 is one of the most commonly used service for hosting instances on AWS cloud. When you have multiple team members, you have to handle headaches of managing their SSH acces. Well... What if I tell you that now :

  • You can manage EC2 ssh access by adding just AWS IAM user policy. Oh yes! You read that right!
  • NO need to add SSH keys and manage those on your own for providing access to users in the organization
  • NO need to release production instance updates to add or remove new users and their SSH keys
  • NO need to worry about the key rotation, key management done by AWS automatically
  • All connection requests using EC2 Instance Connect are logged to AWS CloudTrail so that you can audit connection requests
  • Optionally, If your instance is publically accessible, you can SSH directly from an AWS browser shell window without even doing SSH locally
  • Last but not the least, you can set this up entirely on an instance under just 15 minutes

This is all possible now, thanks to the new AWS service called EC2 instance connect. If this does not convince you to explore more about this, nothing else will!

AWS Instance Connect :

This is by far one of my favorite AWS service announcement of 2019. We all have had our headaches to manage SSH keys on EC2 instances, add new keys for new users, rotate the keys to add more security, remove the keys for users who left the company. Oh man, give me more tissues!

But the new AWS EC2 connect is the ultimate saviour.

AWS EC2 Instance Connect provides a simple and secure way to connect to your instances using Secure Shell (SSH). With EC2 Instance Connect, you use AWS Identity and Access Management (IAM) policies and principals to control SSH access to your instances, removing the need to share and manage SSH keys. All connection requests using EC2 Instance Connect are logged to AWS CloudTrail so that you can audit connection requests.

You can use Instance Connect to connect to your Linux instances using one or all of below :

  • A browser-based client
  • The Amazon EC2 Instance Connect CLI
  • The SSH client of your choice.

The cheery on the top is temporary nature of the SSH public key. When you connect to an instance using EC2 Instance Connect, the instance connect API pushes a one time use SSH public key to the instance which is getting connected. It uses instance metadata for the same. And it key just stays there for 60 seconds, so that SSH is done correctly. That key is then removed and for next connection the same process is done internally by AWS EC2 instance connect.

An IAM policy attached to your IAM user authorizes your IAM user to push the public key to the instance metadata and for the users who do not have this policy attached, they can not connect to the instance.

The SSH daemon internally uses AuthorizedKeysCommand and AuthorizedKeysCommandUser, which are configured when Instance Connect is installed, to look up the public key from the instance metadata for authentication, and connects you to the instance.

Isn't that awesome!

A heads up on instance OS support :

The EC2 instance connect is currently supported for :

  • Amazon Linux 2 having any version
  • Ubuntu 16.04 or later versions

Hoping that AWS will add support for the other operating systems!

Step 1 - Spinning up the EC2 server to dryrun ECV2 Instance Connect :

I would highly recommend to NOT try installing anything on your working instance. It is always safe to try it out on a small vanilla instance, know the gotchas and then be prepared to do it on production or any of your existing instances. So for the dryrun we will spin up a test EC2 instance.

  • Login to your AWS Console and go to the region you want the instance to be in
  • Select EC2 service and click on Launch to spin up a new instance
  • The EC2 launch wizard will be shown, search for ubuntu and press enter
  • It will show number of ubuntu AMIs. Let's choose Ubuntu Server 18.04 LTS
  • Now click on select
  • Click on continue and choose instance type as t2.micro as it is inside the free tier usage
  • Click on Next: Configure Instance Details
  • In this step you dont need to worry about VPC and instance role as this instance is just a test one. You can keep the default settings
  • Click on Next: Add Storage
  • Keep the default storage as it is as we won't need any extra storage space
  • Click on Next: Add Tags and add the tags you need for this instance
  • Click on Next: Configure Security Group
  • You need to select Create a new security group. Add security group name as Temporary EC2 Connect SG. And add just a rule for port 22(SSH) open to all with value 0.0.0.0/0
  • Click on Review and Launch
  • Verify the details once in this final summary screen and click on Launch
  • It will ask you to select a key pair create a new one as EC2-Connect-Dryrun-key-pair and download it.
  • Now finally.. Click on Launch Instances

You are done with launching the instance..

Step 2 : Install EC2 Instance Connect on the instance :

Now, we will install EC2 instance connect service on our new EC2 instance with AWS CLI. You can SSH to your instance using following command :

ssh -i EC2-Connect-Dryrun-key-pair.pem ubuntu@x.x.x.x

Where x.x.x.x is the new instance IP address. Now you can use below set of commands to install AWS CLI and then EC2 instance connect :

# Update the packages as we are logging to the instance for the first time
sudo apt-get -y update
# Install python 3 and pip3 which is needed to install AWS CLI
sudo add-apt-repository ppa:ubuntu-toolchain-r/ppa
sudo apt install -y python3.7 python3-pip
# Install AWS CLI
sudo pip3 install awscli --upgrade --user
# Install EC2 instance connect
sudo apt-get install -y ec2-instance-connect
# Make sure instance connect files are created properly
ls -1  /usr/share/ec2-instance-connect/

You can verify the instance connect has updated the ssh setting by running follwing command :

sudo cat /lib/systemd/system/ssh.service.d/ec2-instance-connect.conf

This should give output containing following strings :

AuthorizedKeysCommand /usr/share/ec2-instance-connect/eic_run_authorized_keys %u %f
AuthorizedKeysCommandUser ec2-instance-connect

Now, you are done with the setup on your instance. Believe it or not, that is it for the instance changes!

Step 3 : Create policy to allow SSH Connect Access :

We will create a new IAM policy which we can attach to a user so that user can SSH to the instance. Below is the policy JSON :

{
    "Version": "2012-10-17",
    "Statement": [
      {
        "Effect": "Allow",
        "Action": "ec2-instance-connect:SendSSHPublicKey",
        "Resource": [
            "arn:aws:ec2:region:account-id:instance/i-1234567890abcdef0",
            "arn:aws:ec2:region:account-id:instance/i-0598c7d356eba48d7"
        ],
        "Condition": {
            "StringEquals": {
                "ec2:osuser": "ubuntu"
            }
        }
      },
      {
        "Effect": "Allow",
        "Action": "ec2:DescribeInstances",
        "Resource": "*"
      }
    ]
}

Make sure you replace the resources with their respective arns. e.g. arn:aws:ec2:us-west-1:12341274:instance/i-1234567890abcdef0 where region is us-west-1 and account id is 12341274.

Let's now understand this policy. This policy will allow user to send a new SSH public key to the instances specified in the resources array. This pushed public key will allow the SSH connection to the instance.

The ec2:osuser as ubuntu is the SSH connection linux user. Realistically ubuntu is the main super user. We will change this on the last part of this article where we can have different linux user having less priviledges on the instance. For now, let's keep going.

The second policy rule ec2:DescribeInstances is used by the user to get instance details from its instance id. We will be using instance id instead of public or private DNS or IP. So this rule is required in the policy so that part of the process works.

  • Login to your AWS Console
  • Select IAM service and click on Policies tab on the left menu
  • Click on Create Policy
  • Click on JSON tab and enter above policy JSON in it. Make sure you replace the instance ARN as per your instance metadata details
  • Click on Review Policy
  • Give policy name as EC2-SSH-Access and enter description you need
  • Click on Create

Now we have the policy ready which can give access to any user to connect to the instance via Secure Shell (SSH).

Step 4 : Create a new User and attach policy :

We will create a new user as user-with-ssh-access and attach above policy.

  • Login to your AWS Console
  • Select IAM service and click on Users tab on the left menu
  • Click on Add User
  • Give user name as user-with-ssh-access
  • In Select AWS access type choose Programmatic access
  • Click on Next: Permissions
  • In set permiossions tab choose Attach existing policies directly
  • Search our policy EC2-SSH-Access and select it
  • Click on Next: Tags and add tags as per your need
  • Click on Next which will review your user
  • Click on Create

Now, we will need to add AWS credentials to this user so that we can use those to connect.

  • Login to your AWS Console
  • Select IAM service and click on Users tab on the left menu
  • Search our user user-with-ssh-access and click on it
  • User Summary page will appear, click on Security credentials tab
  • In Access Keys section click on Create access key
  • It will give you Access Key Id and Secret Access Key. Make sure you save it locally in notepad or somewhere safe as we will need it to ssh to the instance

Step 5 : Setting up local system for Secure Shell(SSH) connection :

Locally you need to have AWS CLI installed. If you do not have it, make sure you install it. Click Here to folow the steps.

Once install run following on your terminal :

aws configure

If you get error like aws command not found find where the aws service is installed on your computer by doing which aws. Sometimes you need to add full path like /usr/local/bin/aws configure

It will ask you details like below :

AWS Access Key ID : ********************
AWS Secret Access Key : ****************************
Default region name [None]: us-west-1
Default output format [None]:

Make sure you add the access key and secret access key we got from earlier step and specify the region in which your EC2 instance resides.

Now, you need to also install EC2 Instance Connect on your local system as it is used to ssh to the instance. Use following command to do the same :

sudo pip install ec2instanceconnectcli

And done! Your local system is ready to SSH connect!

Step 5 : Connect to the instance via Secure Shell(SSH) :

After all above steps are done, we can now SSH to our instance. To ssh we will use mssh command which ships with EC2 instance connect service.

mssh ubuntu@i-xxxxxxxxxxxxxxx

Where i-xxxxxxxxxxxxxxx is the instance id of our test instance we spun up in step 1. You would be able to SSH to the instance if you have followed above steps correctly.

Real world use cases for SSH users :

In above setup, we used ubuntu user to SSH connect. However, in real world we can divide our organizational users who need access into groups based on access they need. For example :

  • You can create a user named administrator on your EC2 instance and then use that as ec2:osuser in our policy for system administrators.
  • You can create a user named developer on your EC2 instance and then use that as ec2:osuser in our policy for application team which might have access to just the application codebase.

Please note that what access and permission the connected user must have is in your hands. The responsibility of EC2 instance connect is just to allow the IAM user to SSH to the instance with allowed SSH user.

Click Here to know more about quick steps to add new user to the instance.

Managing the ssh access :

You can create multiple policies based on the resources and os username the IAM user can SSH to. If you want to give a new user ssh access, you can just attach respective policy to the user. Similarly, you can just remove an existing ssh cononect policy to remove the SSH access from an existing user.

This is a HUGEEEE plus point of this service.

Accessing the connection logs :

EC2 connect pushes the SSH connection logs to AWS Cloudtrail. To view the logs follow below steps :

  • Login to your AWS Console
  • Select Clourtrail service and go to the region you have EC2 instance connect resources in
  • Click on Event History tab on the left menu
  • Addd Event source as the filter type and enter ec2-instance-connect.amazonaws.com as it's value

You would be able to see all the SSH conection logs. Beautiful fact is that, even if you have 10 different IAM users using same SSH user, let's say developer, in the logs, you would be able to differentiate which user connected to SSH via developer connection user.

.....

Read full article

Tags: aws, ec2, instance, connect, audit, ssh, logs, cloudtrail, 22, open, free, private, nat, gateway, linux

A complete setup guide for OpenVPN on AWS with free CertBot SSL

OpenVPN is a commercial VPN solutions service to secure your data communications. You can use this in number of ways like hiding your internet identity, remote access to company, inside IoT security and many more. My most favorite use of OpenVPN is to use it as SSH whitelisting, so you can SSH to your server instances only when you are connected to a certain VPN.

Remember, OpenVPN service is not free, but it's cost is very affordable and reasonable for a personal as well as corporate setup!

Overview of AWS setup :

When you spin up an EC2 instance on AWS, you can either choose from vanilla instance AMIs like basic centos or ubuntu 16.x etc. OR you can choose from pre-baked marketplace AMIs. Services like OpenVPN use marketplace AMIs to provide their pre-baked instances which are ready to use.

But wait.. It is not that plug and play. Setting up OpenVPN can be tricky specially when you do not know the sequence of steps and some little tricks. But, we have got you covered.

We will be also dealing with the common problem of untrusted SSL certificate error and install a free CertBot SSL to make your OpenVPN server full proof. Let's get started!

Step 1 - Spinning up the EC2 server :

  • Login to your AWS Console and go to the region you want yout OpenVPN instance to be in
  • Select EC2 service and click on Launch to spin up a new instance
  • The EC2 launch wizard will be shown, where click on AWS Marketplace on left
  • Now search for openvpn and press enter
  • It will show number of official OpenVPN marketplace AMIs which are different in the number of connected devices. I will strongly recommend if you are doing it for the first time, choose the first one which will give you 2 concurrent devices to start with. You can anytime purchase a new license for extending number of users.

alt text1

  • Now click on select when you have choosen your AMI
  • You will be prompted with OpenVPN service cost for each instance type you spin up. This will be added to your AWS billing. I would always choose t2.micro instance type as OpenVPN server does not need much memory to perform it's operations.
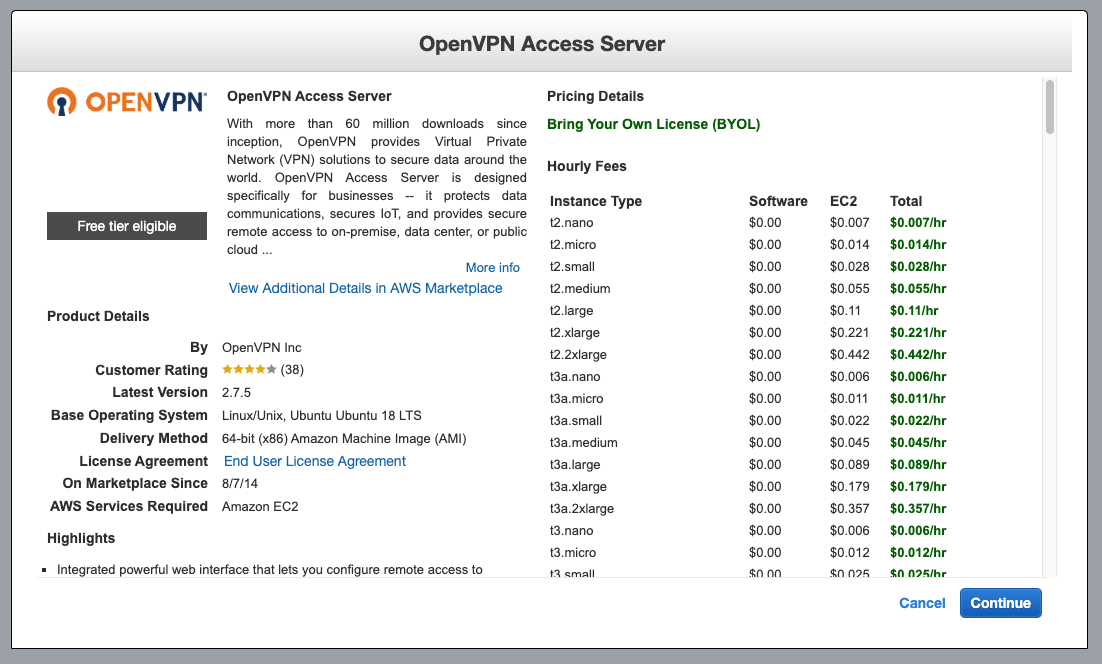
alt text1

  • Click on continue and choose instance type as t2.micro
  • Click on Next: Configure Instance Details
  • This is an important step. Make sure you choose your VPC if you have one and choose it's public subnet. If you do not have custom VPC and subnets, leave these settings as is. Make sure that its a public subnet as OpenVPN instance should be in a public subnet so it is accessible via web directly.
  • Click on Next: Add Storage
  • Here you need to make sure the instance volume is encrypted. Otherwise you will get warning like Volume (/dev/sda1) needs to be encrypted as encryption is enabled by default. Click on Encryption dropdown and choose a KMS key which will encrypt your volume. Also make sure your instance volume type is General Purpoise SSD (gp2). Sometimes it changes to Magnetic (standard) when you enable volume encryption
  • Click on Next: Add Tags and add the tags you need for this instance
  • Click on Next: Configure Security Group
  • You need to select Create a new security group. Add security group name as OpenVPN server SG. Wait.. Hey, AWS already has filled in the group rules for you, thats awesome... isn't it?

alt text1

  • Click on Review and Launch
  • Verify the details once in this final summary screen and click on Launch
  • It will ask you to select a key pair create a new one as OpenVPN-key-pair and download it.
  • Now finally.. Click on Launch Instances

You are done with launching the instance.. Yassssss!! Above steps will launch your new server.

Step 2 - Assigning elastic IP and domain :

When your instance is up and running, you will see it's public IP given by AWS automatically. However, once you reboot this instance anytime, this IP will change. We do not want that. So we will associate an elastic IP to this instance so it stays no matter if the instance is stopped or rebooted.

  • Select EC2 service from the same region where you have the OpenVPN instance
  • Click on Elastic IPs
  • Click on Allocate new address and select Allocate
  • Now you will see a new elasic IP in the list which is not associated with any instance
  • Select that IP and in the actions dropdown choose Associate Address
  • You will see a new association form, keep resource type as Instance and select your new OpenVPN instance from the instance dropdown
  • Save the association
  • Now of you go back to the instance and see it's public IP, you will see the new elastic IP as its public IP.

Now, you can associate a domain to this new public IP or you can keep as it is. It depends on your preference but I would recommend having a domain like vpn.yourdomain.com to access this server.

If you choose to have a domain, then this is the time when you need to point the A record of your domain to the new elastic public IP. For the consistency in remaining article, we are going to use vpn.yourdomain.com.

Step 3 : Initializing up the OpenVPN basic settings :

Now, you will not be able to access openVPN directly. This is because you are yet to initiate the basic settings. For that, we need to ssh into the server.

  • Use the key pair file OpenVPN-key-pair.pem to ssh into the instance. As in the security group port 22 is open for everyone with value 0.0.0.0/0, you would be able to SSH to your instance from anywhere. (We will change that after the setup is completed)
  • Use ssh username as openvpnas as this comes default with the OpenVPN marketplace AMI
  • Once you login to the instance, you will see a setup wizard and it will ask you to agree to the terms and conditions
  • Now it will ask number of settings to you :
openvpnas@openvpnas2:# 

Welcome to OpenVPN Access Server Appliance 2.7.5

  System information as of Sat Oct 19 12:24:42 UTC 2019

  System load:  0.95              Processes:           98
  Usage of /:   26.7% of 7.69GB   Users logged in:     0
  Memory usage: 18%               IP address for eth0: 172.32.1.87
  Swap usage:   0%


          OpenVPN Access Server
          Initial Configuration Tool
------------------------------------------------------
OpenVPN Access Server End User License Agreement (OpenVPN-AS EULA)

    1. Copyright Notice: OpenVPN Access Server License;
       Copyright (c) 2009-2019 OpenVPN Inc. All rights reserved.
       "OpenVPN" is a trademark of OpenVPN Inc.
    2. Redistribution of OpenVPN Access Server binary forms and related documents,
       are permitted provided that redistributions of OpenVPN Access Server binary
       forms and related documents reproduce the above copyright notice as well as
       a complete copy of this EULA.
    3. You agree not to reverse engineer, decompile, disassemble, modify,
       translate, make any attempt to discover the source code of this software,
       or create derivative works from this software.
    4. The OpenVPN Access Server is bundled with other open source software
       components, some of which fall under different licenses. By using OpenVPN
       or any of the bundled components, you agree to be bound by the conditions
       of the license for each respective component. For more information, you can
       find our complete EULA (End-User License Agreement) on our website
       (http://openvpn.net), and a copy of the EULA is also distributed with the
       Access Server in the file /usr/local/openvpn_as/license.txt.
    5. This software is provided "as is" and any expressed or implied warranties,
       including, but not limited to, the implied warranties of merchantability
       and fitness for a particular purpose are disclaimed. In no event shall
       OpenVPN Inc. be liable for any direct, indirect, incidental,
       special, exemplary, or consequential damages (including, but not limited
       to, procurement of substitute goods or services; loss of use, data, or
       profits; or business interruption) however caused and on any theory of
       liability, whether in contract, strict liability, or tort (including
       negligence or otherwise) arising in any way out of the use of this
       software, even if advised of the possibility of such damage.
    6. OpenVPN Inc. is the sole distributor of OpenVPN Access Server
       licenses. This agreement and licenses granted by it may not be assigned,
       sublicensed, or otherwise transferred by licensee without prior written
       consent of OpenVPN Inc. Any licenses violating this provision
       will be subject to revocation and deactivation, and will not be eligible
       for refunds.
    7. A purchased license entitles you to use this software for the duration of
       time denoted on your license key on any one (1) particular device, up to
       the concurrent user limit specified by your license. Multiple license keys
       may be activated to achieve a desired concurrency limit on this given
       device. Unless otherwise prearranged with OpenVPN Inc.,
       concurrency counts on license keys are not to be divided for use amongst
       multiple devices. Upon activation of the first purchased license key in
       this software, you agree to forego any free licenses or keys that were
       given to you for demonstration purposes, and as such, the free licenses
       will not appear after the activation of a purchased key. You are
       responsible for the timely activation of these licenses on your desired
       server of choice. Refunds on purchased license keys are only possible
       within 30 days of purchase of license key, and then only if the license key
       has not already been activated on a system. To request a refund, contact us
       through our support ticket system using the account you have used to
       purchase the license key. Exceptions to this policy may be given for
       machines under failover mode, and when the feature is used as directed in
       the OpenVPN Access Server user manual. In these circumstances, a user is
       granted one (1) license key (per original license key) for use solely on
       failover purposes free of charge. Other failover and/or load balancing use
       cases will not be eligible for this exception, and a separate license key
       would have to be acquired to satisfy the licensing requirements. To request
       a license exception, please file a support ticket in the OpenVPN Access
       Server ticketing system. A staff member will be responsible for determining
       exception eligibility, and we reserve the right to decline any requests not
       meeting our eligibility criteria, or requests which we believe may be
       fraudulent in nature.
    8. Activating a license key ties it to the specific hardware/software
       combination that it was activated on, and activated license keys are
       nontransferable. Substantial software and/or hardware changes may
       invalidate an activated license. In case of substantial software and/or
       hardware changes, caused by for example, but not limited to failure and
       subsequent repair or alterations of (virtualized) hardware/software, our
       software product will automatically attempt to contact our online licensing
       systems to renegotiate the licensing state. On any given license key, you
       are limited to three (3) automatic renegotiations within the license key
       lifetime. After these renegotiations are exhausted, the license key is
       considered invalid, and the activation state will be locked to the last
       valid system configuration it was activated on. OpenVPN Inc.reserves the
       right to grant exceptions to this policy for license holders under
       extenuating circumstances, and such exceptions can be requested through a
       ticket via the OpenVPN Access Server ticketing system.
    9. Once an activated license key expires or becomes invalid, the concurrency
       limit on our software product will decrease by the amount of concurrent
       connections previously granted by the license key. If all of your purchased
       license key(s) have expired, the product will revert to demonstration mode,
       which allows a maximum of two (2) concurrent users to be connected to your
       server. Prior to your license expiration date(s), OpenVPN Inc. will attempt
       to remind you to renew your license(s) by sending periodic email messages
       to the licensee email address on record. You are solely responsible for
       the timely renewal of your license key(s) prior to their expiration if
       continued operation is expected after the license expiration date(s).
       OpenVPN Inc. will not be responsible for any misdirected and/or undeliverable
       email messages, nor does it have an obligation to contact you regarding
       your expiring license keys.
   10. Any valid license key holder is entitled to use our ticketing system for
       support questions or issues specifically related to the OpenVPN Access
       Server product. To file a ticket, go to our website at http://openvpn.net/
       and sign in using the account that was registered and used to purchase the
       license key(s). You can then access the support ticket system through our
       website and submit a support ticket. Tickets filed in the ticketing system
       are answered on a best-effort basis. OpenVPN Inc. staff
       reserve the right to limit responses to users of our demo / expired
       licenses, as well as requests that substantively deviate from the OpenVPN
       Access Server product line. Tickets related to the open source version of
       OpenVPN will not be handled here.
   11. Purchasing a license key does not entitle you to any special rights or
       privileges, except the ones explicitly outlined in this user agreement.
       Unless otherwise arranged prior to your purchase with OpenVPN,
       Inc., software maintenance costs and terms are subject to change after your
       initial purchase without notice. In case of price decreases or special
       promotions, OpenVPN Inc. will not retrospectively apply
       credits or price adjustments toward any licenses that have already been
       issued. Furthermore, no discounts will be given for license maintenance
       renewals unless this is specified in your contract with OpenVPN Inc.

Please enter 'yes' to indicate your agreement [no]: yes

Once you provide a few initial configuration settings,
OpenVPN Access Server can be configured by accessing
its Admin Web UI using your Web browser.

Will this be the primary Access Server node?
(enter 'no' to configure as a backup or standby node)
> Press ENTER for default [yes]: yes

Please specify the network interface and IP address to be
used by the Admin Web UI:
(1) all interfaces: 0.0.0.0
(2) eth0: 172.31.16.206
Please enter the option number from the list above (1-2).
> Press Enter for default [2]: 1

Please specify the port number for the Admin Web UI.
> Press ENTER for default [943]: 943

Please specify the TCP port number for the OpenVPN Daemon
> Press ENTER for default [443]: 443

Should client traffic be routed by default through the VPN?
> Press ENTER for default [yes]: yes

Should client DNS traffic be routed by default through the VPN?
> Press ENTER for default [yes]: yes

Use local authentication via internal DB?
> Press ENTER for default [yes]: yes

Private subnets detected: ['172.31.0.0/16']

Should private subnets be accessible to clients by default?
> Press ENTER for EC2 default [yes]: yes

To initially login to the Admin Web UI, you must use a
username and password that successfully authenticates you
with the host UNIX system (you can later modify the settings
so that RADIUS or LDAP is used for authentication instead).

You can login to the Admin Web UI as "openvpn" or specify
a different user account to use for this purpose.

Do you wish to login to the Admin UI as "openvpn"?
> Press ENTER for default [yes]: yes

> Please specify your OpenVPN-AS license key (or leave blank to specify later):

Initializing OpenVPN...
Adding new user login...
useradd -s /sbin/nologin "openvpn"
Writing as configuration file...
Perform sa init...
Wiping any previous userdb...
Creating default profile...
Modifying default profile...
Adding new user to userdb...
Modifying new user as superuser in userdb...
Getting hostname...
Hostname: openvpnserver
Preparing web certificates...
Getting web user account...
Adding web group account...
Adding web group...
Adjusting license directory ownership...
Initializing confdb...
Generating init scripts...
Generating PAM config...
Generating init scripts auto command...
Starting openvpnas...

NOTE: Your system clock must be correct for OpenVPN Access Server
to perform correctly.  Please ensure that your time and date
are correct on this system.

Initial Configuration Complete!

You can now continue configuring OpenVPN Access Server by
directing your Web browser to this URL:

https://x.x.x.x:943/admin
Login as "openvpn" with the same password used to authenticate
to this UNIX host.

During normal operation, OpenVPN AS can be accessed via these URLs:
Admin  UI: https://x.x.x.x:943/admin
Client UI: https://x.x.x.x:943/

See the Release Notes for this release at:
   https://openvpn.net/vpn-server-resources/release-notes/
  • Now you we need a password to login first time as an admin. For that run command
openvpnas@openvpnas2:~$ sudo passwd openvpn
Enter new UNIX password:
Retype new UNIX password:
passwd: password updated successfully
openvpnas@openvpnas2:~$

You are done with basic setup, we can now proceed with the web UI for further settings.

Step 4 : Accessing OpenVPN Web UI :

Now we will access the OpenVPN Web UI using the elastic IP with url https://x.x.x.x:943/admin where x.x.x.x is your elasic IP. You might be thinking that we have vpn.yourdomain.com setup so why are we using the elastic IP? We will get back to it shortly but for the first time we will need to use the IP.

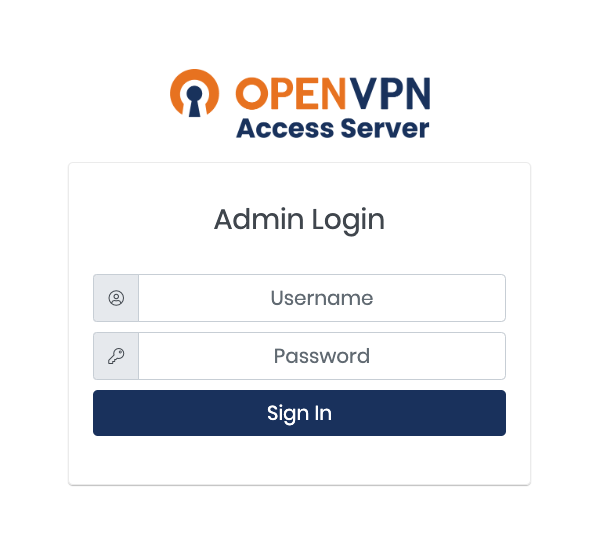
  • Visit https://x.x.x.x:943/admin which will say that it is insecure, click on advanced and proceed to visit the website
alt text1

  • Login with the username openvpn and the admin password you set earlier
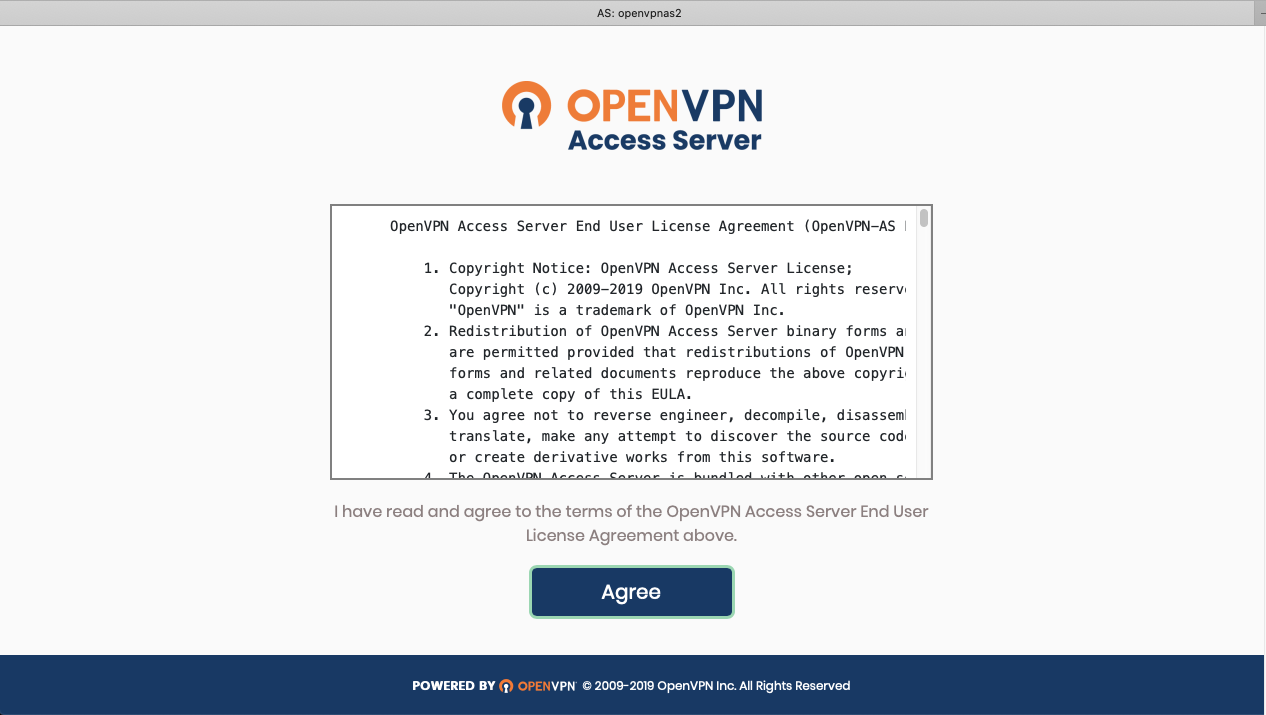
  • Once you login for the first time, you will see a lisence agreement which you select agree
alt text1

  • Now you will see a nice web UI as below :

alt text1

  • Go to Configuration > Network Settings on the left hand side menu
  • You will see a setting Hostname or IP Address. Here we will now enter vpn.yourdomain.com
  • Now click on Save Settings
  • Now click on Update running server

Now we have the domain set up. You can open another tab and visit https://vpn.yourdomain.com:943/admin and it will work now!

Step 5 : Having a valid SSL :

You must have observed that the SSL comes with the OpenVPN server is not trusted by browsers. So we will have a new CertBot SSL which will not show SSL warnings and errors.

  • SSH to the openvpn server again
  • Type following commands to install certbot
sudo apt-get update
sudo apt-get install software-properties-common
sudo add-apt-repository universe
sudo add-apt-repository ppa:certbot/certbot
sudo apt-get update
sudo apt-get install -y certbot

Now we need to open port 80 temporarily on the security group of our OpenVPN server so that Certbot can verify that the server and domain. Certbot will temporarily spin up a webserver on our openVPN machine for the same. - Go to AWS console and choose our OpenVPN server security group OpenVPN server SG - In the inbound rules, add HTTP 80 rule with source 0.0.0.0/0, ::/0 to access tempoarary port 80 traffic

Now we can run Certbot

  • SSH to the openvpn server again
  • Type following commands to request certbot certificate
sudo certbot certonly --standalone

It will ask you number of questions and then a domain name. Enter vpn.yourdomain.com and it will verify it using temporary web server on port 80.

Below is the output :

openvpnas@openvpnas2:~$ sudo certbot certonly --standalone
Saving debug log to /var/log/letsencrypt/letsencrypt.log
Plugins selected: Authenticator standalone, Installer None
Enter email address (used for urgent renewal and security notices) (Enter 'c' to
cancel): support@yourdomain.com

- - - - - - - - - - - - - - - - - - - - - - - - - - - - - - - - - - - - - - - -
Please read the Terms of Service at
https://letsencrypt.org/documents/LE-SA-v1.2-November-15-2017.pdf. You must
agree in order to register with the ACME server at
https://acme-v02.api.letsencrypt.org/directory
- - - - - - - - - - - - - - - - - - - - - - - - - - - - - - - - - - - - - - - -
(A)gree/(C)ancel: A

- - - - - - - - - - - - - - - - - - - - - - - - - - - - - - - - - - - - - - - -
Would you be willing to share your email address with the Electronic Frontier
Foundation, a founding partner of the Let's Encrypt project and the non-profit
organization that develops Certbot? We'd like to send you email about our work
encrypting the web, EFF news, campaigns, and ways to support digital freedom.
- - - - - - - - - - - - - - - - - - - - - - - - - - - - - - - - - - - - - - - -
(Y)es/(N)o: N
Please enter in your domain name(s) (comma and/or space separated)  (Enter 'c'
to cancel): vpn.yourdoman.com
Obtaining a new certificate
Performing the following challenges:
http-01 challenge for vpn.yourdoman.com
Waiting for verification...
Cleaning up challenges

IMPORTANT NOTES:
 - Congratulations! Your certificate and chain have been saved at:
   /etc/letsencrypt/live/vpn.youdomain.com/fullchain.pem
   Your key file has been saved at:
   /etc/letsencrypt/live/vpn.youdomain.com/privkey.pem
   Your cert will expire on 2020-01-14. To obtain a new or tweaked
   version of this certificate in the future, simply run certbot
   again. To non-interactively renew *all* of your certificates, run
   "certbot renew"
 - If you like Certbot, please consider supporting our work by:

Now we are concerned with 2 files : privkey.pem and fullchain.pem. But first, go back to the security group and remove the rule for HTTP port 80 as we do not need it anymore!

Now we will view contents of these files and copy them locally. You can use following commands to show their text content, you need to manually copy them and make new files locally with same name and paste the respective contents.

# Make sure you replace vpn.youdomain.com with your expected domain or ip
cat /etc/letsencrypt/live/vpn.youdomain.com/fullchain.pem
cat /etc/letsencrypt/live/vpn.youdomain.com/privkey.pem

Final step is to update these certificates on OpenVPN web UI. - Visit https://vpn.yourdomain.com:943/admin and login with the admin credentials used earlier - Go to Configuration > Web Server on the left hand side menu - You will 3 file upload options fot uploading certifiates - Upload local fullchain.pem for Certificate file upload - Upload local privkey.pem for Private Key file upload - Click on Validate and you will see new certificate results under Validation Results - Now click on Save - Click on Update running server if it pops up

And now you are done! Logout and login again or a new tab and you will see that new SSL works with no certificate warnings.

Step 6 : Creating an OpenVPN user :

You should never ever use the admin user openvpn to connect via vpn client! We will now create a new user.

  • Visit https://vpn.yourdomain.com:943/admin and login with the admin credentials used earlier
  • Go to User Management > User Permissions on the left hand side menu
  • Enter new username vpnclientuser and click on More Settings Dropdown to set a new passsword
  • Click on Save Settings and Update existing server

Final step : Login with VPN :

Go to your VPN client and enter host as vpn.yourdomain.com with username as vpnclientuser and the password you set for it. And Done!! You are connected.

If you do not have VPN client follow below steps :

  • Visit https://vpn.yourdomain.com:943 (Note that this url is not the admin login but a user login without /admin at the end)
  • Login with the user credentials with username as vpnclientuser and the password you set for it
  • Now you will see options to download VPN client or reset the user password if needed

Cleanup :

Now you are done with the OpenVPN server setup. I would recommend to remove the HTTP 22 inbound rule from OpenVPN server SG security group associated with the VPN server. This is because you would only need SSH access when you want to check logs or update some setup on OpenVPN. You can always go to AWS and open the port when needed.

Alternatively, change the source to your specific IP from which you SSH to the instance so that it is not open to the whole wide internet.

.....

Read full article

Tags: aws, laravel, php, openvpn, open, vpn, 2.7, 2.5, free, certbot, ssl, private, nat, gateway, ec2, expired, linux, renew

PHP OPcache important settings and revalidation simplified

About OPcache :

PHP as a language is an interpreted. But the interpretation happens from the binaries. These binaries are compiled into intermediate bytecodes. OPcache comes into picture during the compilation phase where it stores the precompiled script's bytecodes into a shared memory. When next time PHP needs to compile the same PHP script, the precompile bytecodes from the shared memory are used.. Therefore removing the requirement for PHP to load and parse scripts on each request. As a result improving overall PHP performance.

The OPcache extension is bundled with PHP 5.5.0 and later versions.

Why it is needed :

Okay wait... Let's really get into a very vital need of this OPcache in the ever growing world of PHP frameworks. Any PHP framework has some core package files which we never change. These php package files really let us use the framework capabilities. For example for laravel, we have illuminate's laraval packages. Now on top of that, we install new PHP packages as and when needed using dependency managers like composer. We hardly change these files unless we update/install/remove a package dependency.

Now, independent of which PHP framework you are using, these core PHP script files which constitute framework more or less are compiled for each request to generate their bytecodes for interpretation. Similarly, the dependency package PHP script are compied as per their need for that particular request.

Why do we really need to compile these core PHP script files which we indeed hardly change?? Isn't that an overly unneccessary overhead for PHP compilation process to compile these hundreds of PHP script files on each request and thenm intrepret them? Doesn't make much sense right? There you go.. OPcache to the rescue...

Important settings of OPcache :

As OPcache overall sounds really fascinating which internally optimizes the compilation process of PHP scripts, it is equally important to know the important settings. Cache handling, cache clearing and cache storing and overall invalidation depends on these settings.

  • Finding the php.ini to work with : You need to find the php.ini which is currently in use. There are different ways to find it. You can find it from terminal using :
php --ini | grep -i loaded

OR create a temporary script file called 'info.php` and have following content on it :

phpinfo();

Once you open this file into browser, you would be able to see which php.ini is used.

Mostly if you have php version 7.x with fpm installed then it will be inside /etc/php/7.x/fpm/php.ini. Or if you have 7.x with apache2 installed then it will be inside /etc/php/7.x/apache2/php.ini.

  • Enable opcache :

    In the loaded and used php.ini, you can enable and disable opcache by updating following directive :

    opcache.enable=1 //Enables OPcache
    opcache.enable=0 //Disables OPcache
    

    OPCache also can be enabled for CLI, PHP running from the command line interface(terminal) :

    opcache.enable_cli=1 //Enables OPcache
    opcache.enable_cli=0 //Disables OPcache
    
  • OPcache RAM usage :

    When the entire cache is stored into shared memory, the default max size of that memory storage is 64MB before PHP 7.0.0 and 128MB for after versions. You can update it as per your memory. Ideally 64MB to 128MB size is more than enough for most of the PHP frameworks. In the loaded and used php.ini, you can change this setting by updating following directive :

    opcache.memory_consumption=128
    
  • Cached script limit :

    By default OPcache can cache 2000 files before PHP 7.0.0 and 10000 for after versions. You can increase this number as per your requirement. For frameworks like PHP Magento you could probably have this value bumped up as the core files are large in number.

    First know count of PHP scripting files in your codebase :

    # Make sure you change this path as per your setup
    cd  /var/www/html 
    # Count number of php files
    find . -type f -print | grep php | wc -l
    

    Now above will givbe you a numeric count of total PHP script files in your codebase. Now you can set OPcache setting accordingly. In the loaded and used php.ini, you can change this setting by updating following directive :

    opcache.max_accelerated_files=20000
    
  • Set automated cache clearing :

    When you have new updates in cached PHP script files, OPcache will attempt to clear and then revalidate their cache. This is set using validate_timestamps directive and it happens periodically based on other directive setting revalidate_freq. When this directive is disabled, you MUST reset OPcache manually via opcache_reset(), opcache_invalidate() or by restarting the Web server for changes to the filesystem to take effect. In the loaded and used php.ini, you can change this setting by updating following directive :

    opcache.validate_timestamps=1 //Enabled
    opcache.validate_timestamps=0 //Disabled
    
  • Revalidation and it's frequency :

    OPcache revalidates the opcache afer certain number of seconds to check if your code has changed. 0 value signifies that it checks your PHP code every single request which is unneccessary. By default it happens every 2 seconds. If you have PHP files changing hardly on your setup, it makes sence to increase the frequency duration. As revalidation also takes memory, bumping this up might save unneccessary memory revalidation usage. In the loaded and used php.ini, you can change this setting by updating following directive :

    opcache.revalidate_freq=120
    

    OR you can totally disable this revalidation by updating following directive :

    opcache.validate_timestamps=0 //Disables OPcache revalidation
    

    In your development or sandbox environment you can set this to 0 so that changes take effect immediately. However, it is as good as disabling which can save lot of syscalls.

  • Skipping caching selecively :

    If you know that let's say user.php file in your framework changes often and you do not really want to clear cache everytime it changes. You can basically have OPcache ignore the caching of this file. It is called blacklisting file in terms of OPcache. This setting is littlbit different. It takes an absolute path location of a .txt file. In this text file you can specify the files you want to blacklist(skip) for caching. In the loaded and used php.ini, you can change this setting by updating following directive :

    opcache.blacklist_filename=/etc/php/7.x/fpm/opcache_blacklist.txt
    

    You can have whatever name you want for this text file. And then inside opcache_blacklist.txt :

    #Specific file inside /var/www/html/
    /var/www/html/user.php 
    
    #All files starting with user* inside /var/www/html/
    /var/www/html/user
    
    #Wildcare usage inside /var/www/html/
    /var/www/*-user.php
    
  • Increasing request response shutdown :

    PHP OPcache uses a mechanism which checks for repetitive occurances of strings and internally stores single value of it with remaining ones having pointer to the same value. The fascinating thing is instead of having a pool of these strings for each and every FPM process, this shares it across all of your FPM processes.

    In OPcache settings, you can control how much memory this process can use from directive opcache.interned_strings_buffer Its default value is 4(MB) before PHP 7.0.0 and 8(MB) for after versions.

    In the loaded and used php.ini, you can change this setting by updating following directive :

    opcache.interned_strings_buffer=12
    

Note that to have changes to take effect from php.ini, you need to restart PHP FPM or apache2 depending on your setup.

Clearing the OPcache :

When OPcache is enabled, any changes in cached PHP script files will not take effect until OPcache is cleared or it is revalidated. This is applicable when you release new updates into a OPcache enabled PHP server.

To clear cache there are multiple ways :

  • Clearing from browser :

    You can have a file opcache_refresh.php with following content :

    try{
        opcache_reset();
        echo "OPcache has been cleared successfully!";
    }
    catch(\Exception $e){
        echo "Oops.. OPcache could not be cleared!";
    }
    

    When you request this file from browser, it will reset(clear) the opcache and any new changes done inside the cached files will start reflecting.

  • Clearing from terminal :

    If you have nginx with PHP FPM :

    sudo service php7.x-fpm reload
    

    If you have apache2 :

    sudo service apache2 reload
    
  • Using cachetool :

    This is very useful when you do not want to have an open PHP file to reset opcache and you do not want to reload FPM or apache2 for the same. cachetool is a way between the two :

    To Install :

    // Download the phar
    curl -sO http://gordalina.github.io/cachetool/downloads/cachetool.phar
    // Set permissions
    chmod +x cachetool.phar
    

    Now you can clear opcache using following command :

    // Using an automatically guessed fastcgi server
    php cachetool.phar opcache:reset --fcgi
    
    // Using php fpm socket
    php cachetool.phar opcache:reset --fcgi=/var/run/php7.x-fpm.sock
    

OPcache and the automated deployments :

When you have automated deployments set up on your PHP server, you need to incorporate OPcache clearing so that new changes take effect.

If you do not perform this manually, eventually OPcache will revalidate itself based on your OPcache revalidation settings assuming you have validate_timestamps set to 1. But it is pretty handy to do it manually as part of your automated deployment scripts to make sure changes take immediate effect.

From my personal experience, relading FPM or apache2 to clear OPcache is not a good option. Even if it gracefully reloads PHP processes, any request which is(unfortunarely) ongoing on the server gives 502 bad gateway. I would rather use the alternative like cachetool mentioned in above section which does not affect any ongoing PHP processes at all.

The sequence when you reload OPcache matters. As soon as git or any of your deployment methods pulls the latest PHP code changes, you should first clear the OPcache. Then you can run all the remaining deployment commands which may use the updated PHP files. This makes sure the deployment commands do not use cached PHP script opcodes even when the sever has pulled the latest changes.

.....

Read full article

Tags: aws, laravel, php, fpm, opcache, zend, 7.2, cache, apc, fullpagecache, optimization, configuration, invalidation, blacklist, clearcache, revalidation, cachetool, deployment, cicd, linux

Manage laravel .env file using AWS parameter store

When you have an application hosted on AWS EC2 instances which runs on an environment file, like laravel framework needs .env environment file, it is always a pain to manage environment variables.

Specially when you have multiple EC2 instances running for production on an auto-scaling setup. Please note that these are not host OS environment variable, but the application framework's environment variables in the respective env file.

You may alternatively call them application configuration files. You mostly do not add them in git or bitbucket due to the possibility of them containing sensitive information, e.g. database passwords, AWS access credentials etc..

Problem statement :

  • You have environment .env file inside your EC2 AMI
  • When you spin up an instance, the .env file comes from the AMI specified in the launch configuration, considering you have auto-scaling set up
  • If you want to update any existing .env variable, you need to spin up new AMI and update production servers

If your production environment has a setup like above, you may have experienced bit of pain in changing .env variables. Specially when there is a quick turnaround required due to some urgency or bug where you need to update an .env file variable asap.

EC2 user_data coming to rescue :

When you spin up a new instance, you have an option in Step 3: Configure Instance Details screen inside Advanced Details called user_data. This looks something like below :

You can write shell scripts in text area or upload a bash file as per your choice. When you launch an instance in Amazon EC2, these shell scripts will be run after the instance starts. You can also pass cloud-init directives but we will stick to shell script for this use case to fetch the environment variables from systems manager parameter store and generate an environment file, in our case .env file under laravel root.

alt text1

Setting up variables in parameter store :

AWS has service called Systems Manager which contains a sub-service for resource sharing. This is called Parameter Store. There are couple of ways to store a parameter inside this service. We will be using SecureString option which makes sure the paramater value(which in our case is the enviromnent file contents) are encrypted inside AWS.

You may think that instead of storing entire .env file content into a single text-area, why should we not create multiple paremeters for each variable in the .env file? That's a perfectly valid point. However, storing it in one paramter store decreases overall maintenability and also makes the shell script to retrive those values very compact.

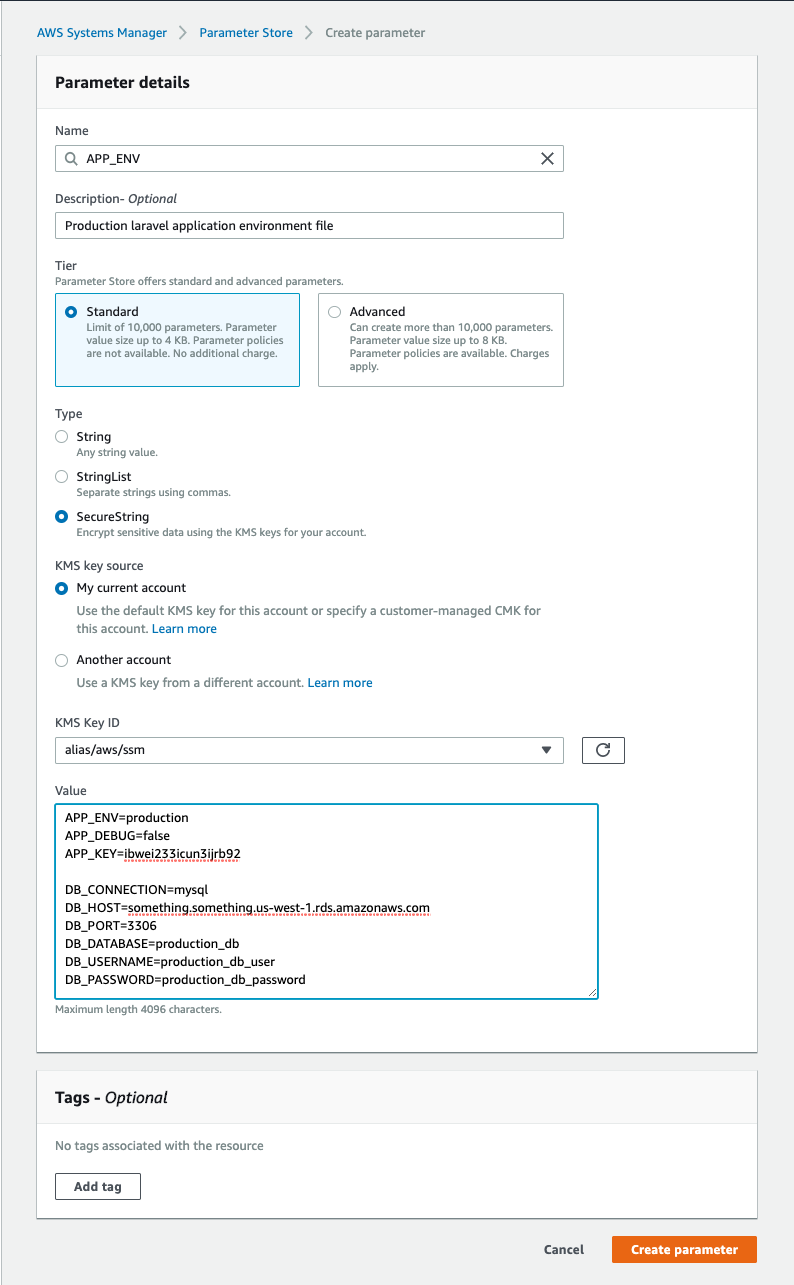
You can use below steps to store your .env file inside parameter store :

  1. Login to AWS console and switch to the region which contains your production setup
  2. Go to Systems Manager and click on Parameter Store
  3. Click on Create Parameter
  4. Add Name and Description
  5. Select Tier as Standard
  6. Select Type as SecureString
  7. Select KMS key which managed encryption as per your choice
  8. Enter entire .env contents into the text-area
  9. Click on Create Parameter to save the parameter

alt text1

Accessing the paremeter store values :

Your EC2 instance which runs the application will be accessing these parameter store values. So you need to make sure your instance IAM role has following permission in its policy.

{
    "Version": "2012-10-17",
            "Statement": [
        {
            "Sid": "VisualEditor1",
            "Effect": "Allow",
            "Action": [
                "ssm:GetParameters",
                "ssm:GetParameter",
            ],
            "Resource": [
                "arn:aws:ssm:*:*:parameter/*"
            ]
        }
    ]
}

Shell script to generate .env :

We will be using following shell script to generate .env :

#!/bin/bash

# Please update below varoables as per your production setup
PARAMATER="APP_ENV"
REGION="us-west-1"
WEB_DIR="/var/www/html"
WEB_USER="www-data"

# Get parameters and put it into .env file inside application root
aws ssm get-parameter --with-decryption --name $PARAMATER --region $REGION | jq '.Parameter.Value' > $WEB_DIR/.env

# Clear laravel configuration cache
cd $WEB_DIR
chown $WEB_USER. .env
sudo -u $WEB_USER php artisan config:clear

Putting pieces together :

Let us now consider a very generic overview of how these pieces will fit together :

  • You will have your .env file stored in AWS systems manager parameter store with encryption enabled at rest
  • When a new instance will spin up, it will pull the env string and put into an .env file. This will happen using user_data setting
  • It will clear the application env cache or any dependent commands to take new environmental file into effect

Fundamental implementation situations :

Let's say you have added a new variable in your env paramater group. You expect it to reflect ASAP in following situations :

  • All the new EC2 instances which will spin up after that point should always use the new env file variables :

This can be easily implemented as we discussed earlier using user_data. When you spin up an instance manually you can add the above shell script to pull latest .env from parameter group in the user_data field.

If you have auto-scaling enabled, make sure your launch configuration or launch template has the user_data field set with the shell script we discussed in the previous section. This will then make sure, whenever a new EC2 instance will spin up, it will always fetch the environmental paramater first from AWS systems manager's parameter group store and then make a branch new .env file.

  • The existing instances which are already running should fetch the updated env file variables :

Let's first take out the case where you have instance not in any auto-scaling group. You can then manually SSH into instance and fetch the new .env. (Or automate it using Solution B)

But in here main point of concern is when you have autoscaling setup and production is running on multiple instances. This is an area where we can have 2 solutions. First one is very easy to implement whereas second one can be a pain. Let's discuss both :

Solution A :

From your existing auto-scaling instances, start terminating an instance one by one. Your auto-scaling setup will then spin up new instances. As we discussed earlier, considering your launch configuration already has the shell script to pull updated environment variables from parameter group at the instance start from user_data setting, the new instances will be ready with updated environmental veriables in their .env files.

To add more automation, you may also do the termination activity using a lambda function or ansible based on a trigger when systems manager's parameter group is updated.

Solution B :

This is important for applications where there ephemeral storage is important for some ongoing tasks. If we terminate the instances, the production application will lose some of it's ongoing process data. In this case we need to find an automated way to run the shell script on all those running instances, to update their .env variables.

In this case, you can use AWS lambda for this purpose. The bottom line of this is When systems manager's parameter group is updated, it will trigger a lambda function. That lambda function will SSH into all your running production instances and update the .env file.

There is already a github repo I have added sometime back on running SSH commands on EC2 instances. You can click here to know more about it.

My two cents :

This may definitely appear as an overhead... But as your application becomes large, setting these things up will make your life so much easier.

.....

Read full article

Tags: aws, laravel, php, ssm, system, manager, parameter, store, environment, env, file, configuration, config

Ansible everything you need to know about set_facts

If you have seen lot of ansible playbook examples, set_facts module is very common in most of them. Let us dive little deeper to know what is it and how it may help you to write dynamic playbooks.

The jargon set_facts :

If you just read set_facts in an ansible playbook, it is really hard to interpret what it really means. You may think like it is setting some kind of facts but what facts? I had the same doubt and I was little overwhelmed by the terminology in here. But, to understand in generic terms :

set_facts module sets variables once you know their values and optionally deciding if you need their values to be set or not.

You may set simple variables in ansible using vars, vars_file or include_vars modules, however you know their values beforehand. In case of set_facts, you set variables on the fly depending on certain task results. These variables will be available to be used in the subsequent plays during an ansible playbook execution.

Let's see a real life use case :

Before diving into an actual playbook and overal syntax, let's first take a real life use case, which will help us connect the dots.

Use case : We need to spin up an instance on AWS and then add it into an existing AWS Target Group.

Known Variables : We will have some known variables like the instance AMI id and the instance type.

Unkwnon Variables : To add an instance to target group, we need the instance id. However, until that instance is spun up, we will not have the instance id. This will be set on the fly once instance is spun up.

In this case, we will use known variables to spin up an instance. Once that task is done, we will get an instance id from AWS. Thats a fact which we have come across from that task. We will set it to a variable using set_facts module and then it can be used later to add instance into an existing AWS Target Group.

Register and set_facts go hand in hand :

Until you have receieved a factual information or to be specific, a task result, you do not have facts to set using set_facts module. This is why I always feel register module and set_facts module go hand in hand.

Please note that, there are lots of other ways to get factual information from a task and register is not the only way. But it is one of the most common ways you would get facts. Some other modules to get factual information can be ansible_facts to get package information (package_facts) from a host. The possibilities are much more.

set_facts is host specific :

A very important thing to note that when you set a fact using set_facts module, it is specific to the host within which task is currently running. As documentation says : Variables are set on a host-by-host basis just like facts discovered by the setup module. If your playbook has multiple hosts then you can not share a fact set using set_facts from one host to another.

Diving into an example :

Let's take the use case we discussed earlier and make a simple playbook for it. We will have following structure :

ReleaseAMIUpdates/
├── config.yml
├── env.yml
├── playbook.yml
└── setup.sh

Please note that you may have more detailed structure based on your preferences. This article is about exploring set_facts, so we will focus more on its implementation.

  • config.yml :

This file will have the configuration variables which rarely change.

vpc_id: vpc-12345678
ec2_iam_role: ec2-iam-role-name
instance_type: t2.micro
instance_volume_in_gb: 30
instance_security_group: ec2-security-group-name
ami_id: ami-12345678
instance_key_name: ansible-instance.pem
  • env.yml :

This file will have the configurations which are sensitive and may change .

region: us-west-1
aws_access_key: your_aws_access_key
aws_secret_key: your_aws_secret_key
target_group: Test Ansible Target Group
  • setup.sh :

This file will have any user-data boostrap commands you need to run as soon as new instance is spun up. We will use this to install nginx so that we can server web traffic with a simple web page.

#!/bin/bash

# Update Package Lists
apt-get update

# Install add-apt-repository dependencies
apt-get install software-properties-common -y
apt-get install python-software-properties -y

# Update Package Lists
apt-get update -y

# Install nginx 
apt-get -y install nginx

Now you have above yml files set up, these files will act as environment variable files. We will refer the configurations specified above as variables in our playbook.

  • playbook.yml :

This file will contain all palybook tasks.

# create a launch configuration using an AMI image and instance type as a basis
- name: Launch new AMI Release
  hosts: localhost
  connection: local
  vars_files:
    - ./env.yml
    - ./config.yml

  tasks:

  #  Get VPC public subnet details as it will be needed later while launching the sandbox instance
  - name: Get VPC Subnet Details
    ec2_vpc_subnet_facts:
      aws_access_key: "{{ aws_access_key }}"
      aws_secret_key: "{{ aws_secret_key }}"
      region: "{{ region }}"
      filters:
        vpc-id: "{{ vpc_id }}"
        "tag:Availability": "Public"
    # Save the result json in variable subnet_facts_public
    register: subnet_facts_public

  - name: Get VPC Subnet ids which are available and public
    set_fact:
      vpc_subnet_id_public: "{{ subnet_facts_public.subnets|selectattr('state', 'equalto', 'available')|map(attribute='id')|list|random }}"

  # Launch instance with required settings
  - name: Launch new instance
    ec2:
      key_name: "{{ instance_key_name }}"
      aws_access_key: "{{ aws_access_key }}"
      aws_secret_key: "{{ aws_secret_key }}"
      region: "{{ region }}"
      image: "{{ ami_id }}"
      instance_profile_name: "{{ ec2_iam_role }}"
      vpc_subnet_id: "{{ vpc_subnet_id_public }}"
      instance_type: "{{ instance_type }}"
      group: "{{ instance_security_group }}"
      assign_public_ip: False
      # All commands specified in below will run as soon as instance is launched
      user_data: "{{ lookup('file', 'setup.sh') }}"
      wait: True
      wait_timeout: 500
      volumes: 
        - device_name: /dev/sda1
          volume_size: "{{ instance_volume_in_gb }}"
          volume_type: gp2
          encrypted: True
          delete_on_termination: True
      instance_tags:
        Name: Ansible-Test-Instance
    register: ec2

  # Get instance id from registered facts in ec2
  - name: Get instance id from registered facts in ec2
    set_fact:
      new_instance_id: "{{ ec2.instance_ids[0] }}"

  # Add newly created instance into target group
  - name: Add newly created instance into target group
    elb_target_group:
      name: "{{ target_group }}"
      aws_access_key: "{{ aws_access_key }}"
      aws_secret_key: "{{ aws_secret_key }}"
      region: "{{ region }}"
      target_type: instance
      health_check_interval: 30
      health_check_path: /health
      health_check_protocol: http
      health_check_timeout: 15
      healthy_threshold_count: 2
      unhealthy_threshold_count: 2
      protocol: http
      port: 80
      vpc_id: "{{ _vpc_id }}"
      successful_response_codes: "200"
      targets:
        - Id: "{{ new_instance_id }}"
          Port: 80
      state: present

Lets walk through each task in above playbook.yml first before we run it :

  1. We already know our vpc id. But to spin up an instance, we will need to get subnet id. We will use ansible module ec2_vpc_subnet_facts to get the public subnets. We will register that result into subnet_facts_public variable.
  2. We will use subnet_facts_public variable to parse its content and get a public subnet which is available chosen randomly from set of available public subnets from the results. The type of parsing used is called jinja which comes within ansible. Once we have that fact, we will set it using set_facts into vpc_subnet_id_public variable on the fly.
  3. We will launch new instance and then get its information. We will register that into ec2 variable.
  4. We will use ec2 variable to parse its content and get the instance id of newly spun up instance. Once we have that fact, we will set it using set_facts into new_instance_id variable on the fly.
  5. Finally we will update our target group and add this instance into its targets.

Conditionally set facts :

You might need to set a fact using set_facts module when another variable or result registered contains some dependent value. In such case you can use when conditional.

Example :

- name: Get VPC Subnet ids which are available and public
    set_fact:
      vpc_subnet_id_public: "{{ subnet_facts_public.subnets|selectattr('state', 'equalto', 'available')|map(attribute='id')|list|random }}"
    when: region == "us-west-2" 

Caching a set fact :

You can cache a fact set from set_facts module so that when you execute your playbook next time, it's retrieved from cache. You can set cacheable to yes to store variables across your playbook executions using a fact cache. You may need to look into precedence strategies used by ansible to evaluate the cacheable facts mentioned in their documentation.

.....

Read full article

Tags: aws, ansible, devops, automation, set_facts, set, facts, variables, onthefly, fly, dynamically, dynamic

Ansible AWS rolling AMI update with zero downtime

If you have website hosted on AWS with an Auto Scaling enabled, doing AMI rolling updates manually is a pain. But ansible makes it so much easy for you. Let's understand how you can save time and efforts for AMI rolling updates with zero downtime.

What is a rolling AMI update :

When you have Auto Scaling enabled, AWS will scale up and down your setup by increasing or decreasing number of instances automatically based on server load and your auto scaling policies. AWS uses an instance template called Launch Configuration using which it understands what AMI to use when spinning up new instances automatically to scale up.

Now, lets assume that you have 4 instances currently in-service associated with your auto scaing with their AMI version as V1. Now you need to release a new AMI version V2. What you will ideally do is :

  • Create a new launch configuration which points to new AMI version V2. To do it manually you will basicaly copy your existing launch configuration and update AMI id.
  • Edit your Auto Scaling group and associate it with newly created launch configuration.
  • By just doing above steps will not update the existing in-service instances. You will terminate the existing in-service instances one by one. Once an instance inside auto-scaling in-service listeners is terminated, auto scaling group will launch a new one to keep minimum number of instances in-service as per the auto scaling policy.
  • This new instance will now be from AMI version V2

This is a rolling update, which most of the times is done manually. It takes approx 10-15 minutes to do it manually. Let's understand how you can do it under 2-3 minutes with ansible with 2-3 minutes rollback with just one configuration change.

Prerequisites :

You will need following before you start working on ansible playbook and it's tasks :

  • You will need ansible 2.8.x and boto3 installed on the system. Preferred way to install these is using pip installer.
  • You will need an AWS CLI user with access key and secret access key. I always prefer doing this in a non-production region first so that if you mess up anything, there is minimum worry. Let's say your production AWS region is us-west-1 then you woul setup a clone in us-west-2 and then test ansible playbook in there. You can use below IAM policy for the CLI user
{
    "Version": "2012-10-17",
    "Statement": [
        {
            "Effect": "Allow",
            "Action": [
                "ec2:*",
                "rds:*",
                "lambda:*",
                "autoscaling:*",
                "iam:PassRole",
                "elasticloadbalancing:*"
            ],
            "Resource": "*",
            "Condition": {
                "StringEquals": {
                    "aws:RequestedRegion": "us-west-2"
                }
            }
        }
    ]
}

Setup :

We will have following structure :

ReleaseAMIUpdates/
├── config.yml
├── env.yml
├── playbook.yml
└── startup.sh
  • config.yml :

This file will have the configuration variables which rarely change.

project_lunch_config_name: Production Launch configuration
project_autoscaling_group_name: Prod Auto Scaling Group
project_vpc_id: vpc-12345678
project_ec2_iam_role: ec2-iam-role-name
project_instance_type: t2.micro
project_instance_volume_in_gb: 30
project_instance_security_group: ec2-security-group-name
  • env.yml :

This file will have the configurations which are sensitive and may change in each rolling update.

project_region: us-west-1
project_aws_access_key: your_aws_access_key
project_aws_secret_key: your_aws_secret_key
project_golden_ami_id: ami-version-id
project_ami_version: V2
project_target_group_arn: arn:aws:elasticloadbalancing:us-west-2:123456789:targetgroup/Your-TargetGroup/233vc4441187369
  • startup.sh :

This file will have any user-data boostrap commands you need to run as soon as new instance is spun up.

#!/bin/bash

# Add your commands here
# These will run as root
# Which means ~ refers to /root

Now you have above yml files set up, these files will act as environment variable files. We will refer the configurations specified above as variables in our playbook.

  • playbook.yml :

This file will contain all palybook tasks.

# create a launch configuration using an AMI image and instance type as a basis
- name: Launch new AMI Release
  hosts: localhost
  connection: local
  vars_files:
    - ./env.yml
    - ./config.yml

  tasks:

  #  Get VPC subnet details as it will be needed later while setting up autoscaling group
  - name: Get VPC Subnet Details
    ec2_vpc_subnet_facts:
      aws_access_key: "{{ project_aws_access_key }}"
      aws_secret_key: "{{ project_aws_secret_key }}"
      region: "{{ project_region }}"
      filters:
        vpc-id: "{{ project_vpc_id }}"
        "tag:Availability": "Private"
    # Save the result json in variable subnet_facts
    register: subnet_facts

  # From the previously registered variable subnet_facts
  # Get filter subnet which are in avaible state
  # Use jinja to parse json and get list of ids
  # This list will be used directly while setting up autoscaling group
  - name: Get VPC Subnet ids which are available
    set_fact:
      vpc_subnet_ids: "{{ subnet_facts.subnets|selectattr('state', 'equalto', 'available')|map(attribute='id')|list }}"

  # Create new launch configuration as existing one can not be edited
  # This launch configuration will contain the new AMI
  - name: Configure new launch configuration
    ec2_lc:
      aws_access_key: "{{ project_aws_access_key }}"
      aws_secret_key: "{{ project_aws_secret_key }}"
      region: "{{ project_region }}"
      name: "{{ project_lunch_config_name }}"
      # This image Id will be the new golden AMI after release is complete
      image_id: "{{ project_golden_ami_id }}"
      instance_profile_name: "{{ project_ec2_iam_role }}"
      vpc_id: "{{ project_vpc_id }}"
      security_groups: ["{{ project_instance_security_group }}"]
      instance_type: "{{ project_instance_type }}"
      # All commands specified in below ./startup.sh will run as soon as instance is launched
      user_data_path: ./startup.sh
      volumes:
      - device_name: /dev/sda1
        volume_size: "{{ project_instance_volume_in_gb }}"
        volume_type: gp2
        iops: 3000
        delete_on_termination: true
        encrypted: true

  # Update autoscaling group and associate new launch configuration
  # As there is no AMI just to update an existing autoscaling group
  # We specify all options and ansible will match the name to update
  - name: Update Auto Scalling Group with new launch configuration
    ec2_asg:
      aws_access_key: "{{ project_aws_access_key }}"
      aws_secret_key: "{{ project_aws_secret_key }}"
      name: "{{ project_autoscaling_group_name }}"
      region: "{{ project_region }}"
      launch_config_name: "{{ project_lunch_config_name }}"
      default_cooldown: 180
      health_check_period: 300
      health_check_type: ELB
      target_group_arns: ["{{ project_target_group_arn }}"]
      desired_capacity: 4
      min_size: 4
      max_size: 6
      vpc_zone_identifier: "{{ vpc_subnet_ids }}"
      # Below settings will replace all existing instances in this autoscaling group
      # With instances of new AMI release
      # The replacing will happen in batches with 2 instances replaced at at time
      replace_all_instances: true
      replace_batch_size: 2
      # We will wait untill all newly replaced instances are healthy and in service
      # Max wait time will be 10 minutes after which ansible will time out
      # In case of timeout the activity will keep happening on AWS
      # Just that the terminal will not wait for the output and exit with code 0
      wait_for_instances: true
      wait_timeout: 600
      # Below tabs will be present on all production instances launched with new AMI
      tags:
      - Environment: Production
        Name : "Production instances | {{ project_ami_version }}"
        Project: Your Project Name
        Vesion : "{{ project_ami_version }}"

Lets walk through each task in above playbook.yml first before we run it :

  1. Get VPC Subnet Details : The instances will be launched in a VPC. We will need the subnet ids from the VPC we will need instances to be present in. In here I have used a tag Availability:Private to only get private instances as in my setup, instances are not publically accessible from a public subnet.

  2. Get VPC Subnet ids which are available : The 1st task will give us entire json details of VPC subnets. This task will filter and get only ids using jinja parsing of the json result.

  3. Configure new launch configuration : We will create a new launch configuration. I have been very descriptive in the options used in this task to make sure it's easy to refer next time.

  4. Update Auto Scalling Group with new launch configuration : This will associate the new launch configuration to an existing auto scaling group. Make sure your auto scaling group name matches to the one present already so that it's updated properly. The replace_all_instances: true makes sure we are rolling the new AMIs instantly. This task will wait for the instances to spin up and be in-service state. This is sepcified by wait_for_instances and wait_timeout options in this task.

Running the playbook :

First step is to make sure you have correct variables set in the env.yml and config.yml. When you do it for the second time, you will just need to change project_golden_ami_id and project_ami_version variables.

Before running it directly, it's always safe to run it using --check mode as a dryrun, with -vv to have more verbose output :

ansible-playbook playbook.yml -vv --check

Deploying the new AMI :

ansible-playbook playbook.yml -vv

Rolling back the update :

If your AMI which was newly released had issues, you can easily roll it back by specifying old stable values in project_golden_ami_id and project_ami_version variables. Then you just need to deploy the playbook.

Why to invest time in ansible :

As your AWS setup grows, the manual activities which were simple at first become start becoming an overhead. Plus, there is always a risk of errors when manual operations are concerned. Using an automation tool like ansible lets you do the same actions with 70-80% less time than you would need to do it manually. Also ansible playbooks become a reference documentation if you need to explain anyone from your team how AMI updates are performed.

Tracking ansible playbooks in git repo :

If you want to track these ansible playbooks in git, make sure you do not track the main env.yml file which has AWS CLI crednetials. That is why we have 2 separate files env.yml and config.yml.

Improvements :

If you would like, you can update the AWS CLI user IAM policy to add more granuler permissions which is always preferable.

.....

Read full article

Tags: aws, ansible, devops, automation, ami, rolling, update

Laravel APP_KEY rotation policy for app security

If you have an existing laravel app running or you do fresh laravel installation, you will notice in your app's .env file (in case of new installations it's in .env.example file), there is a key called APP_KEY. It is a 32 characters long string. This is the laravel application key.

Laravel has an artisan command php artisan key:generate which generates a new APP_KEY for you. If you have installed Laravel via Composer or the Laravel installer, this key will be set for you automatically by the key:generate command.

Why your app key is important?

The APP_KEY is used to keep your user sessions and other encrypted data secure! If the application key is not set, your user sessions and other encrypted data will not be secure. Believe it or not it is a big security risk.

To give you more specific context, earlier laravel had a security issue :

If your application's encryption key is in the hands of a malicious party, that party could craft cookie values using the encryption key and exploit vulnerabilities inherent to PHP object serialization / unserialization, such as calling arbitrary class methods within your application.

Do not worry, laravel later released a security update which disabled all serialization and unserialization of cookie values using APP_KEY. All Laravel cookies are encrypted and signed, cookie values can be considered safe from client tampering. clich here to see details about this security update.

Before Update :

If used to serialize all values during encryption.

$encryptedValue = \openssl_encrypt(serialize($value), $this->cipher, $this->key, 0, $iv);

After Update :

It will serialize only if you pass second parameter as true while calling encrypt function.

$encryptedValue = \openssl_encrypt(
    $serialize ? serialize($value) : $value,
    $this->cipher, $this->key, 0, $iv
);

Okay, to sum it up, APP_KEY is important and any backdoor associated with it which leads to compromising app security should be closed.

Passwords and APP_KEY :

When we consider parts of the app which have encryption, first thing comes to mind is the user passwords. Let's take a minute to differentiate both :

  • Encryption :

Encryption is when you have a data which you want to safeguard. So you take original data, encrypt it using key and ciphers so it turns into gibrish string. This gribrish string has no meaning and hence it can not be interpreter directly toits original data meaning. When you need, you can decrypt this encrypted value to retrive it in original state.

Laravel has Crypt facade which helps us implement encryption and decryption.

In this case, the key and ciphers are important because those are used in decryption. And should NOT be explosed.

  • Hashing :

Hashing in simple terms is one way encryption. Once you encrypt you can NOT decrypt it in original state. You can verify if the hash matches a plain value to check if its the original value or not. But that's all you can do. It is way more secure in terms of sensitive information like user passwords.

Laravel has Hash facade which helps us implement one way hashing encryption.

Now, one of the main thing you should understand : APP_KEY is NOT used in Hashing and it is used in encryption. So your passwords security is NOT dependent on the APP_KEY. Whereas any data of your app which you have encrypted do have dependency on APP_KEY.

Affects of changing APP_KEY :

Before we dive into how to change APP_KEY, it is important to know what will happen if we change it. When APP_KEY is changed in an existing app :

  • Existing user sessions will be invalidated. Hence, all your currently active logged in users will be logged out.
  • Any data in your app which you have encrypted using Crypt facade or encrypt() helper function will no longer be decrypted as the encryption uses APP_KEY.
  • Any user passwords will NOT be affected so no need to worry about that.
  • If you have more than one app servers running, all should be replaced with the same APP_KEY.

Let's handle the headache first :

As seen above, you can imagine most headache in changing APP_KEY is handling the data which is encrypted using old app key. For that you need to first decrypt the data using old APP_KEY and then re-encrypt using new APP_KEY. Damn!

Don't worry! Here is a simple helper function you can use :

/**
 * Function to re-encrypt when APP_KEY is rotated/changed
 * 
 * @param string $oldAppKey
 * @param mixed $value
 */
function reEncrypt($oldAppKey, $value)
{
    // Get cipher of encryption
    $cipher = config('app.cipher');
    // Get newly generated app_key
    $newAppKey = config('app.key');

    // Verify old app Key
    if (Str::startsWith($oldAppKey, 'base64:')) {
        $oldAppKey = base64_decode(substr($oldAppKey, 7));
    }
    // Verify new app Key
    if (Str::startsWith($newAppKey, 'base64:')) {
        $newAppKey = base64_decode(substr($newAppKey, 7));
    }

    // Initialize encryptor instance for old app key
    $oldEncryptor = new Illuminate\Encryption\Encrypter((string)$oldAppKey, $cipher);

    // Initialize encryptor instance for new app key
    $newEncryptor = new Illuminate\Encryption\Encrypter((string)$newAppKey, $cipher);

    // Decrypt the value and re-encrypt
    return $newEncryptor->encrypt($oldEncryptor->decrypt($value));
}

Let's imagine we have a column called bank_account_number in users table which is stored as encrypted string. I have another column called old_bank_account_number in the users table to store old value as a backup before we save newly re-encrypted value. We can create a command php artisan encryption:rotate :

<?php

namespace App\Console\Commands;

use App\User;
use Illuminate\Console\Command;
use Illuminate\Encryption\Encrypter;

class EncryptionRotateCommand extends Command
{
    /**
     * The name and signature of the console command.
     *
     * @var string
     */
    protected $signature = 'encryption:rotate {--oldappkey= : Old app key}';

    /**
     * The console command description.
     *
     * @var string
     */
    protected $description = 'Re-encrypt when APP_KEY is rotated';

    /**
     * Create a new command instance.
     *
     */
    public function __construct()
    {
        parent::__construct();
    }

    /**
     * Function to re-encrypt when APP_KEY is rotated/changed
     * 
     * @param string $oldAppKey
     * @param mixed $value
     */
    public function handle()
    {
        // Get the old app key
        $oldAppKey = $this->option('oldappkey');

        // Get cipher of encryption
        $cipher = config('app.cipher');
        // Get newly generated app_key
        $newAppKey = config('app.key');

        // Verify old app Key
        if (Str::startsWith($oldAppKey, 'base64:')) {
            $oldAppKey = base64_decode(substr($oldAppKey, 7));
        }
        // Verify new app Key
        if (Str::startsWith($newAppKey, 'base64:')) {
            $newAppKey = base64_decode(substr($newAppKey, 7));
        }

        // Initialize encryptor instance for old app key
        $oldEncryptor = new Encrypter((string)$oldAppKey, $cipher);

        // Initialize encryptor instance for new app key
        $newEncryptor = new Encrypter((string)$newAppKey, $cipher);

        User::all()->each(function($user) use($oldEncryptor, newEncryptor){

            // Stored value in a backup column
            $user->old_bank_account_number  = $user->bank_account_number;

            // Decrypt the value and re-encrypt
            $user->bank_account_number  = $newEncryptor->encrypt($oldEncryptor->decrypt($user->bank_account_number));
            $user->save();

        });

        $this->info('Encryption completed with newly rotated key');
    }
}

Update :

I have pushed a new package which helps to simplify above implementation. click here to view the Laravel package.

Rotating the key :

Finally, lets rotate the key.

- Run `php artisan down` on all instances so that no user can interact until this is done
- Go to terminal on one of the instance and open your `.env` file. 
- Copy the APP_KEY value which is the old(existing) app key
- Run `php artisan key:generate` which will generate a new APP_KEY
- Run the helper command as we created above to re-encrypt the values `php artisan encryption:rotate --oldappkey=your_old_app_key_value`
- Replace the APP_KEY key on all remaining instances
- Run `php artisan config:clear` on all instances
- Run `php artisan cache:clear` on all instances
- Run `php artisan view:clear` on all instances
- Run `php artisan up` on all instances

And.. It's done! You can do this based on key rotation frequency you are comfortable in. I would recommend at-least once in 3 months.

.....

Read full article

Tags: laravel, php, app_key, key, rotation, security, policy

AWS update AMI using systems manager automation

Overview :

Having am AMI(Amazon Machine Image) of the most stable production server is a very common practice. On top of that adding maintenance scripts, installing new softwares or patching hotfixes are some of the common actions we need to perform on AMI.

The general flow in simple terms is :

- Take an existing AMI(Let's call it AMI-V1)
- Launch an instance originating from the AMI-V1
- SSH into the new instance
- Run maintenance or installation commands
- Create a new AMI(Let's call it AMI-V2)
- Terminate the tempararily launched instance
- Optionally if you have autoscaling group launch configurations, then update it's association with new AMI-V2

If you do all above steps manually, there is nothing wrong in it. However, AWS has a service called Systems Manager which has a sub-service automation. It can help you to automate and also optionally schedule these AMI updates automatically. Trust me! If you know how to do it once, you will never go back to manual updates.

How it works :

SSM's automation service has different types. Those are called Executions. When you add details on what and how to setup that execution, the entire thing is called Execution Document. Dont worry, it's not that important to remember these names as long as you know how to use it.

There are many different types of executions available in automation service. One which we are looking for is called AWS-UpdateLinuxAmi. This execution helps us to automate updates to AMI with Linux distribution packages and Amazon software.

When you create the execution to automate the AMI updates, you can specify which AMI to update, specify the script of commands to run and specify the new AMI name. There are more steps to it which we will cover in Implementation section down below.

Prerequisites and difficult terms explained :

Before starting actual implementation, let's take a minute to understand few terms which are little tricky. I am very sure if any of you have dived into SSM automation for first time, you came across these and felt little overwhelmed.

When you set up the AWS-UpdateLinuxAmi automation, the form in AWS console asks you to give certain parameters(details of the setup)

The 2 parameters IamInstanceProfileName and AutomationAssumeRole are tricky to understand.

  • IamInstanceProfileName :

It's also referred as ManagedInstanceProfile. When AWS SSM runs the automation execution AWS-UpdateLinuxAmi, SSM needs to take certain actions in EC2 service. These are launching an instance from an existing source AMI, creating a new AMI from updated instance state and terminating the temparary instance etc.

For this purpose you create a new IAM Role (Identity Access Manamegement Role). The IamInstanceProfileName is nothing but the name of this created IAM Role.

  • AutomationServiceRole :

When SSM runs the automation execution AWS-UpdateLinuxAmi, SSM needs to assume the IAM role which we created for IamInstanceProfileName above, pass it as allowed so that it can function with the respective policies it's attached with.

For this purpose you create second a new IAM Role (Identity Access Manamegement Role). The AutomationServiceRole is nothing but the arn(Amazon Resource Name) of this created IAM Role.

  • Trust Relationships :

When you create both these roles mentioned above(We will dived in detail below), we need to update their Trust Relationships. With IAM roles, you can establish mutual trust relationships between your trusting account. In short, the trusting account owns the resource to be accessed and the trusted account contains the users who need access to the resource.

Creating required IAM roles :

Step 1 : Create IAM Role for IamInstanceProfileName :
- Login to AWS console and go to `IAM` service. 
- Go to Roles listing and click on `Create Role`
- Keep type selected as `AWS Service`
- Below in `Choose the service that will use this role` section select `EC2`
- Click on `Next : Permissions` button on bottom right
- It will bring the page to attach permission policies
- Select `AmazonEC2RoleforSSM` policy
- Click on `Next : Tags` button on bottom right
- Add tags if you want or skip to next step by clicking `Next : Review` button on bottom right
- It will bring page to add role details
- Add a `Role name` as `ManagedInstanceProfileForSSM`
- Click on `Create Role`
Step 2 : Create IAM Role for AutomationServiceRole :
- Login to AWS console and go to `IAM` service. 
- Go to Roles listing and click on `Create Role`
- Keep type selected as `AWS Service`
- Below in `Choose the service that will use this role` section select `EC2`
- Click on `Next : Permissions` button on bottom right
- It will bring the page to attach permission policies
- Select `AmazonSSMAutomationRole` policy
- Click on `Next : Tags` button on bottom right
- Add tags if you want or skip to next step by clicking `Next : Review` button on bottom right
- It will bring page to add role details
- Add a `Role name` as `AutomationServiceRole`
- Click on `Create Role`
Step 3 : Get the arn string of ManagedInstanceProfileForSSM :

We need to associate the first cerated IAM role IamInstanceProfileName to pass in this role.

- Go to Roles listing and select `ManagedInstanceProfileForSSM`
- It will show the details of this role
- Copy the `arn` of this role 
- The arn will be in a format `arn:aws:iam::{IAM_USER_ID}:role/ManagedInstanceProfileForSSM`
- Keep this arn string somewhere as we will need it in next steps
Step 4 : Create policy to pass the above arn into second role :
- Login to AWS console and go to `IAM` service. 
- Go to `Policies` listing and click on `Create Ppolicy`
- It will show you visual editor and JSON tabs
- Click on `JSON` tab and paste following policy json
{
    "Version": "2012-10-17",
    "Statement": [
        {
            "Sid": "VisualEditor0",
            "Effect": "Allow",
            "Action": "iam:PassRole",
            "Resource": "arn:aws:iam::{IAM_USER_ID}:role/ManagedInstanceProfileForSSM"
        }
    ]
}
- Make sure you replace the resource arn in this policy json with the one you copied just few steps back
- Click on `Review Policy` button on bottom right 
- Give policy name as `PassPolicyForIamInstanceProfileRole` and create the policy
Step 5 : Attach policy to pass the above arn into second role :
- Login to AWS console and go to `IAM` service.
- Go to Roles listing and select `AutomationServiceRole`
- Click on `Attach Policies` and attach `PassPolicyForIamInstanceProfileRole` policy
Step 5 : Update trust relationships :
- Login to AWS console and go to `IAM` service.
- Go to Roles listing and select `ManagedInstanceProfileForSSM`
- Go go `Trust Relationships` tab and click on `Edit trust relationship`
- Add following json and click on `Update trust relationship` in bottom right
{
    "Version": "2012-10-17",
    "Statement": [
        {
        "Effect": "Allow",
        "Principal": {
            "Service": [
            "ec2.amazonaws.com",
            "ssm.amazonaws.com"
            ]
        },
        "Action": "sts:AssumeRole"
        }
    ]
}

Hush!! Now the confusing part is DONE! We have few lats simple steps to complete.

Creating script of commands to run :

We need to create a script of commands which will run on the instance. This script needs to be stored on web and we just pass url of this script while configuring the automation execution.

For this, we will simply create an s3 bucket and store file in there instead.

- Login to AWS console and go to `S3` service.
- Click on `Create Bucket`
- Give bucket a name and click on `Create`
- Create a script file on your local machine with name `ssm-automation.sh` and add below contents in it
#!/bin/bash

# This script installs latex on the instance
# Feel free to change this as per your needs
sudo apt-get update
sudo apt-get install texlive-latex-base -y --allow-unauthenticated
- Now upload this script file from your local machine to the new s3 bucket
- Once upload is completed, click on the file and click on `Make Public` so that it's publically accessible
- Copy its public url and save it somewhere as we will need it in next step

The moment you have been waiting for :

Now its time to set up the final automation execution.

- Login to AWS console and go to `Systems Manager` service.
- Click on `Automation`
- Click on `Execute Automation`
- Choose document page select `AWS-UpdateLinuxAmi`

alt text

- Click on `Next` on bottom right
- Add `SourceAmiId` as the AMI you want to update
- Add `IamInstanceProfileName` with value `ManagedInstanceProfileForSSM`
- In `AutomationAssumeRole` select `AutomationServiceRole`
- Update `TargetAmiName` with one you want
- Select instance type based on memory and space you need for your command executions
- Keep `SubnetId` blank if you do not want to launch the temparary instance in a specific VPC subnet
- Keep `PreUpdateScript` to `none`
- Update `PostUpdateScript` with public s3 script url
- Keep `IncludePackages` and `ExcludePackages` to `none`
- And finally... Click on `Execute`

alt text1

You will see progress of the automation with each step and it's details.

alt text

Some suggestions on best practices :

  1. If you have AWS instances setup in a custom VPC to comply with security regulations, make sure you select the VPC subnet ID so that the temparary instance will launch in that VPC. If not specified it launches instance in Default VPC
  2. The script of commands you put in s3 should not contain any sensitive information. Instead, store it in AWS System manager parameter store. You need to make sure your EC2 instance profile has policy to access the parameter store.
  3. Know what your commands do to guess how much memory and space and set the instance type accordingly while configuration automation execution.
  4. Once you are comfortable with above basic setup, go ahead and study the execution document json. You can do lot of customization and actions like what happens if a step fails etc.

Why so much pain :

You might be thinking why go through so much pain of setup when manually you can do it in 15-20 minutes? Don't worry as it's a one time setup time. Next time all you need to do it update the AMI script in s3 and run the execution. Grab your coffee and relax when AWS creates a new update AMI version for you!

.....

Read full article

Tags: aws, ssm, systems, manager, ami, automation