A complete setup guide for OpenVPN on AWS with free CertBot SSL
OpenVPN is a commercial VPN solutions service to secure your data communications. You can use this in number of ways like hiding your internet identity, remote access to company, inside IoT security and many more. My most favorite use of OpenVPN is to use it as SSH whitelisting, so you can SSH to your server instances only when you are connected to a certain VPN.
Remember, OpenVPN service is not free, but it's cost is very affordable and reasonable for a personal as well as corporate setup!
Overview of AWS setup :
When you spin up an EC2 instance on AWS, you can either choose from vanilla instance AMIs like basic centos or ubuntu 16.x etc. OR you can choose from pre-baked marketplace AMIs. Services like OpenVPN use marketplace AMIs to provide their pre-baked instances which are ready to use.
But wait.. It is not that plug and play. Setting up OpenVPN can be tricky specially when you do not know the sequence of steps and some little tricks. But, we have got you covered.
We will be also dealing with the common problem of untrusted SSL certificate error and install a free CertBot SSL to make your OpenVPN server full proof. Let's get started!
Step 1 - Spinning up the EC2 server :
- Login to your AWS Console and go to the region you want yout OpenVPN instance to be in
- Select EC2 service and click on
Launchto spin up a new instance - The EC2 launch wizard will be shown, where click on
AWS Marketplaceon left - Now search for
openvpnand pressenter - It will show number of official OpenVPN marketplace AMIs which are different in the number of connected devices. I will strongly recommend if you are doing it for the first time, choose the first one which will give you 2 concurrent devices to start with. You can anytime purchase a new license for extending number of users.
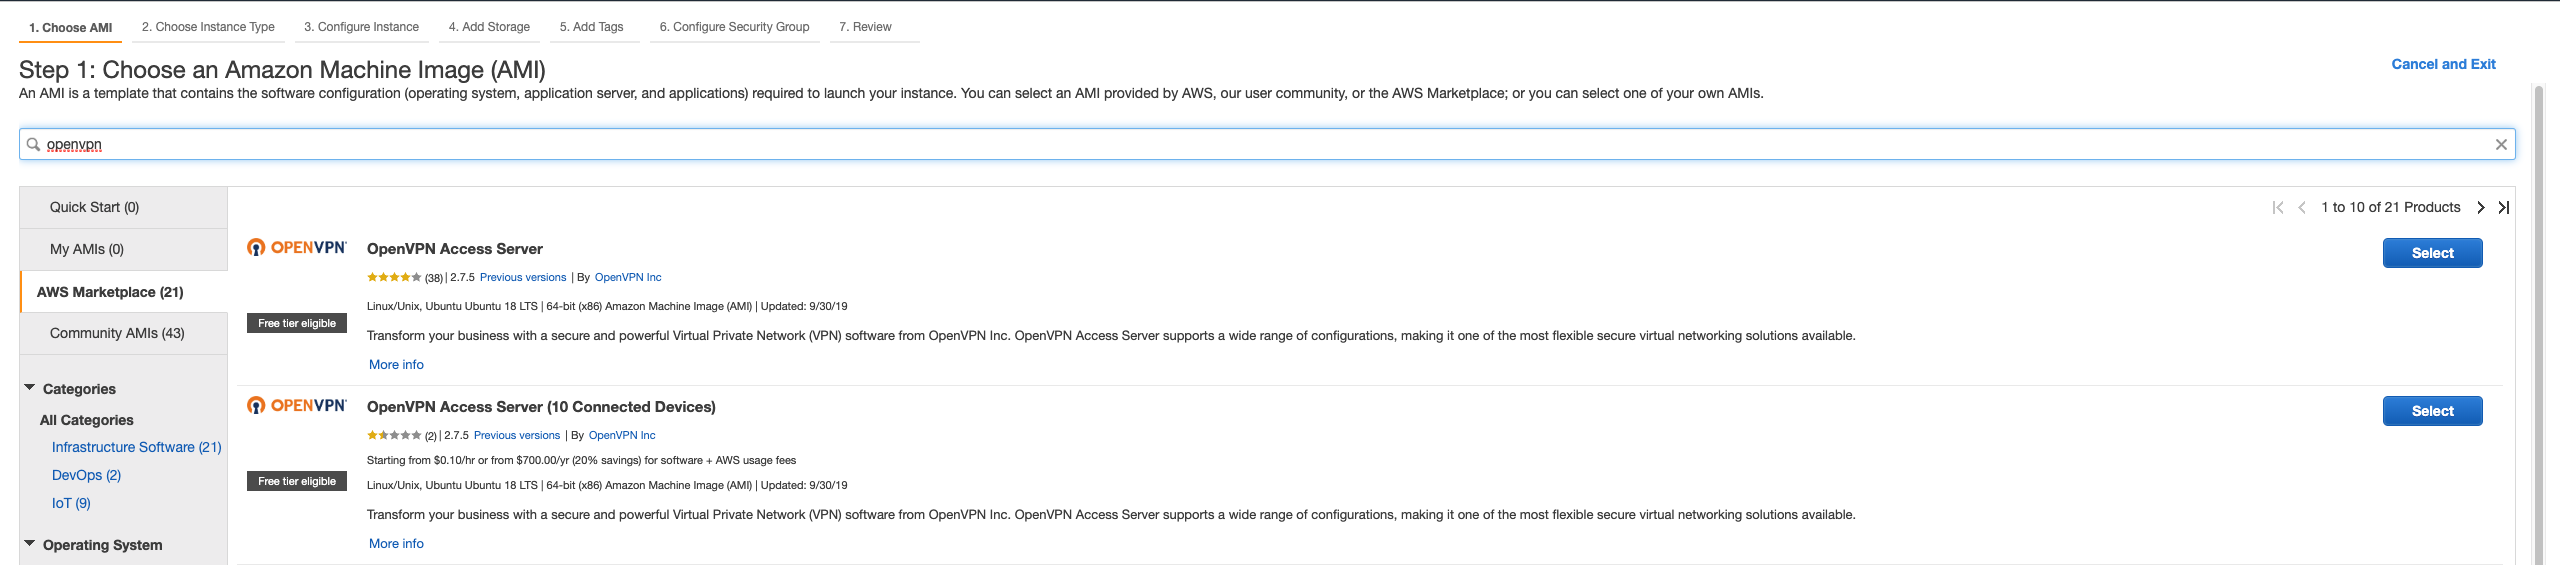
- Now click on
selectwhen you have choosen your AMI - You will be prompted with OpenVPN service cost for each instance type you spin up. This will be added to your AWS billing. I would always choose
t2.microinstance type as OpenVPN server does not need much memory to perform it's operations.
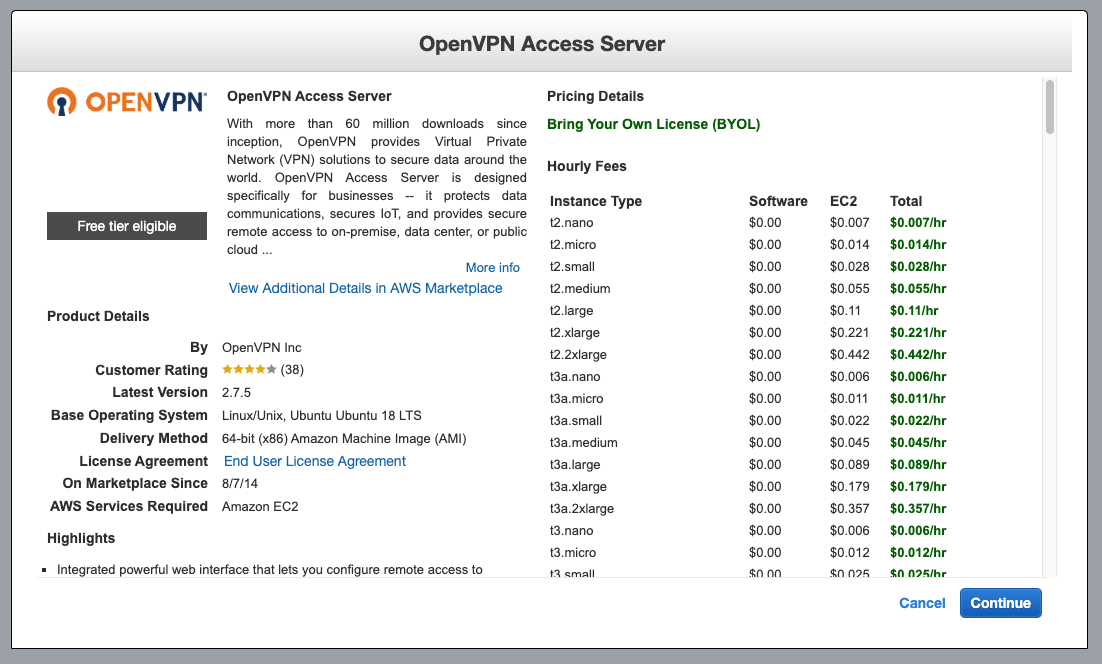
- Click on
continueand choose instance type ast2.micro - Click on
Next: Configure Instance Details - This is an important step. Make sure you choose your VPC if you have one and choose it's public subnet. If you do not have custom VPC and subnets, leave these settings as is. Make sure that its a public subnet as OpenVPN instance should be in a public subnet so it is accessible via web directly.
- Click on
Next: Add Storage - Here you need to make sure the instance volume is encrypted. Otherwise you will get warning like
Volume (/dev/sda1) needs to be encrypted as encryption is enabled by default.Click onEncryptiondropdown and choose a KMS key which will encrypt your volume. Also make sure your instance volume type isGeneral Purpoise SSD (gp2). Sometimes it changes toMagnetic (standard)when you enable volume encryption - Click on
Next: Add Tagsand add the tags you need for this instance - Click on
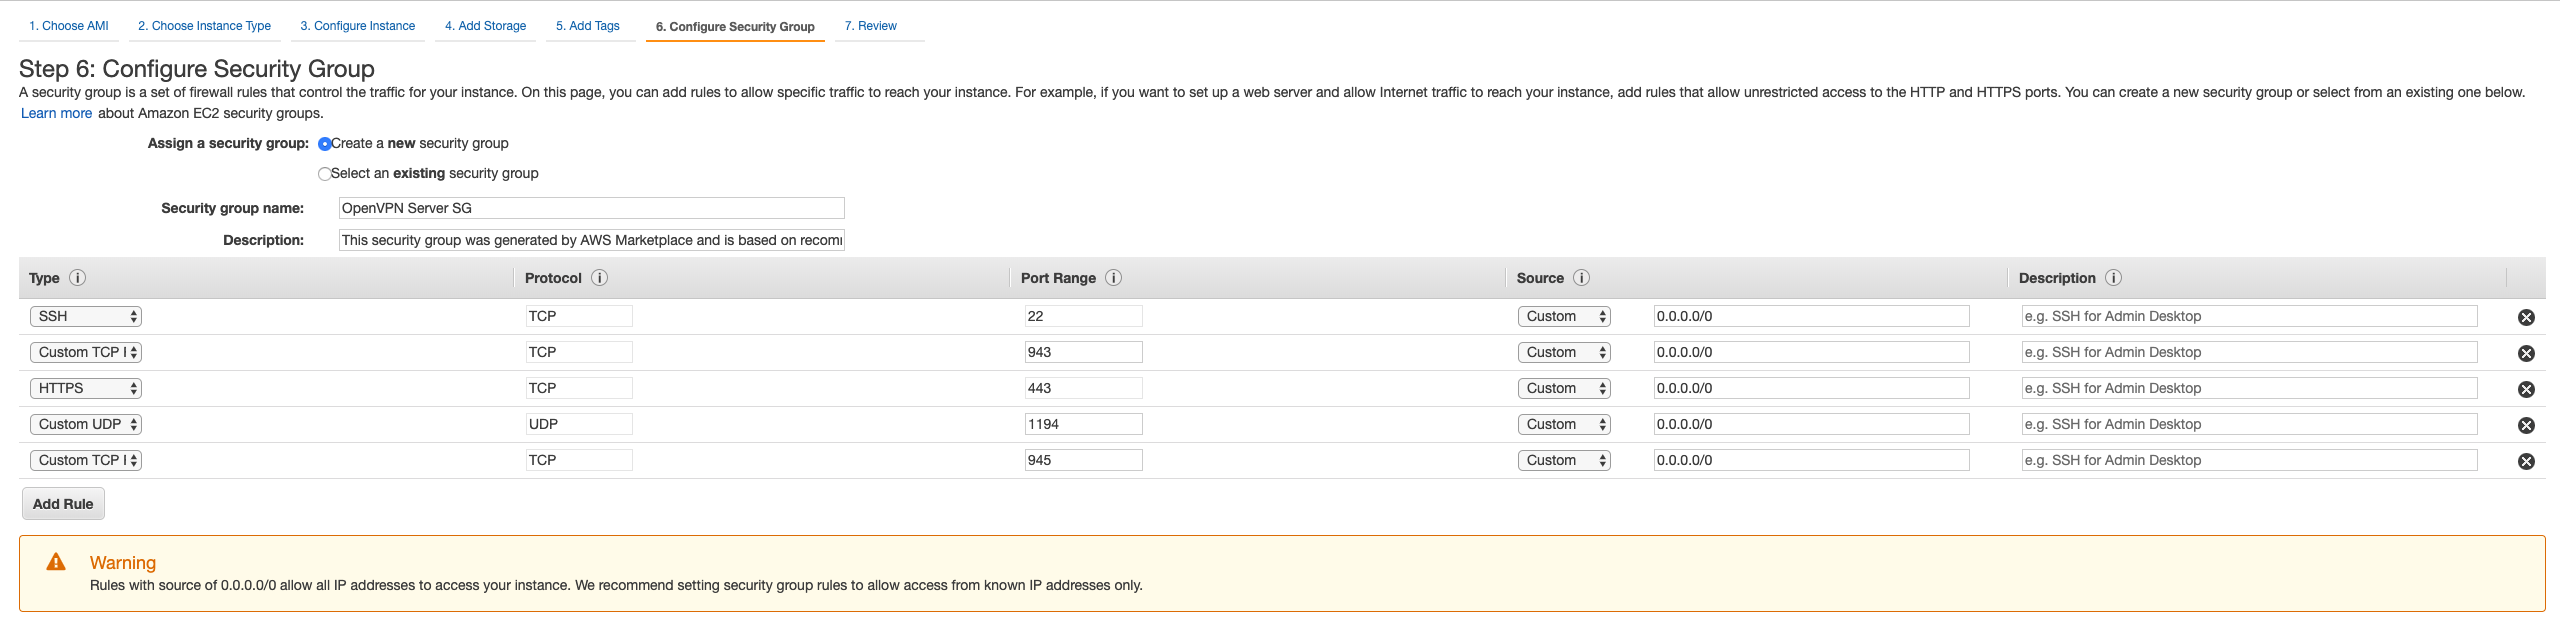
Next: Configure Security Group - You need to select
Create a new security group. Add security group name asOpenVPN server SG. Wait.. Hey, AWS already has filled in the group rules for you, thats awesome... isn't it?
- Click on
Review and Launch - Verify the details once in this final summary screen and click on
Launch - It will ask you to select a
key paircreate a new one asOpenVPN-key-pairand download it. - Now finally.. Click on
Launch Instances
You are done with launching the instance.. Yassssss!! Above steps will launch your new server.
Step 2 - Assigning elastic IP and domain :
When your instance is up and running, you will see it's public IP given by AWS automatically. However, once you reboot this instance anytime, this IP will change. We do not want that. So we will associate an elastic IP to this instance so it stays no matter if the instance is stopped or rebooted.
- Select EC2 service from the same region where you have the OpenVPN instance
- Click on
Elastic IPs - Click on
Allocate new addressand selectAllocate - Now you will see a new elasic IP in the list which is not associated with any instance
- Select that IP and in the actions dropdown choose
Associate Address - You will see a new association form, keep resource type as
Instanceand select your new OpenVPN instance from the instance dropdown - Save the association
- Now of you go back to the instance and see it's public IP, you will see the new elastic IP as its public IP.
Now, you can associate a domain to this new public IP or you can keep as it is. It depends on your preference but I would recommend having a domain like vpn.yourdomain.com to access this server.
If you choose to have a domain, then this is the time when you need to point the A record of your domain to the new elastic public IP. For the consistency in remaining article, we are going to use vpn.yourdomain.com.
Step 3 : Initializing up the OpenVPN basic settings :
Now, you will not be able to access openVPN directly. This is because you are yet to initiate the basic settings. For that, we need to ssh into the server.
- Use the key pair file
OpenVPN-key-pair.pemto ssh into the instance. As in the security group port22is open for everyone with value0.0.0.0/0, you would be able to SSH to your instance from anywhere. (We will change that after the setup is completed) - Use ssh username as
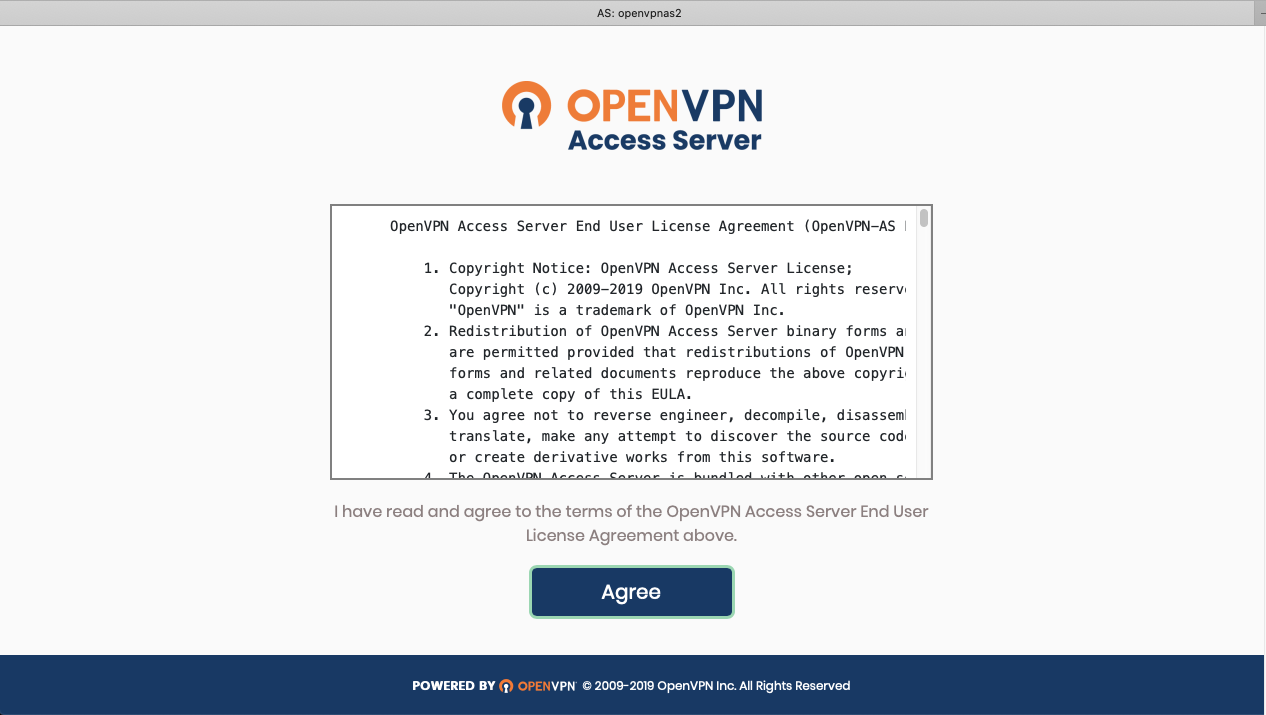
openvpnasas this comes default with the OpenVPN marketplace AMI - Once you login to the instance, you will see a setup wizard and it will ask you to agree to the terms and conditions
- Now it will ask number of settings to you :
openvpnas@openvpnas2:#

Welcome to OpenVPN Access Server Appliance 2.7.5

  System information as of Sat Oct 19 12:24:42 UTC 2019

  System load:  0.95              Processes:           98
  Usage of /:   26.7% of 7.69GB   Users logged in:     0
  Memory usage: 18%               IP address for eth0: 172.32.1.87
  Swap usage:   0%


          OpenVPN Access Server
          Initial Configuration Tool
------------------------------------------------------
OpenVPN Access Server End User License Agreement (OpenVPN-AS EULA)

    1. Copyright Notice: OpenVPN Access Server License;
       Copyright (c) 2009-2019 OpenVPN Inc. All rights reserved.
       "OpenVPN" is a trademark of OpenVPN Inc.
    2. Redistribution of OpenVPN Access Server binary forms and related documents,
       are permitted provided that redistributions of OpenVPN Access Server binary
       forms and related documents reproduce the above copyright notice as well as
       a complete copy of this EULA.
    3. You agree not to reverse engineer, decompile, disassemble, modify,
       translate, make any attempt to discover the source code of this software,
       or create derivative works from this software.
    4. The OpenVPN Access Server is bundled with other open source software
       components, some of which fall under different licenses. By using OpenVPN
       or any of the bundled components, you agree to be bound by the conditions
       of the license for each respective component. For more information, you can
       find our complete EULA (End-User License Agreement) on our website
       (http://openvpn.net), and a copy of the EULA is also distributed with the
       Access Server in the file /usr/local/openvpn_as/license.txt.
    5. This software is provided "as is" and any expressed or implied warranties,
       including, but not limited to, the implied warranties of merchantability
       and fitness for a particular purpose are disclaimed. In no event shall
       OpenVPN Inc. be liable for any direct, indirect, incidental,
       special, exemplary, or consequential damages (including, but not limited
       to, procurement of substitute goods or services; loss of use, data, or
       profits; or business interruption) however caused and on any theory of
       liability, whether in contract, strict liability, or tort (including
       negligence or otherwise) arising in any way out of the use of this
       software, even if advised of the possibility of such damage.
    6. OpenVPN Inc. is the sole distributor of OpenVPN Access Server
       licenses. This agreement and licenses granted by it may not be assigned,
       sublicensed, or otherwise transferred by licensee without prior written
       consent of OpenVPN Inc. Any licenses violating this provision
       will be subject to revocation and deactivation, and will not be eligible
       for refunds.
    7. A purchased license entitles you to use this software for the duration of
       time denoted on your license key on any one (1) particular device, up to
       the concurrent user limit specified by your license. Multiple license keys
       may be activated to achieve a desired concurrency limit on this given
       device. Unless otherwise prearranged with OpenVPN Inc.,
       concurrency counts on license keys are not to be divided for use amongst
       multiple devices. Upon activation of the first purchased license key in
       this software, you agree to forego any free licenses or keys that were
       given to you for demonstration purposes, and as such, the free licenses
       will not appear after the activation of a purchased key. You are
       responsible for the timely activation of these licenses on your desired
       server of choice. Refunds on purchased license keys are only possible
       within 30 days of purchase of license key, and then only if the license key
       has not already been activated on a system. To request a refund, contact us
       through our support ticket system using the account you have used to
       purchase the license key. Exceptions to this policy may be given for
       machines under failover mode, and when the feature is used as directed in
       the OpenVPN Access Server user manual. In these circumstances, a user is
       granted one (1) license key (per original license key) for use solely on
       failover purposes free of charge. Other failover and/or load balancing use
       cases will not be eligible for this exception, and a separate license key
       would have to be acquired to satisfy the licensing requirements. To request
       a license exception, please file a support ticket in the OpenVPN Access
       Server ticketing system. A staff member will be responsible for determining
       exception eligibility, and we reserve the right to decline any requests not
       meeting our eligibility criteria, or requests which we believe may be
       fraudulent in nature.
    8. Activating a license key ties it to the specific hardware/software
       combination that it was activated on, and activated license keys are
       nontransferable. Substantial software and/or hardware changes may
       invalidate an activated license. In case of substantial software and/or
       hardware changes, caused by for example, but not limited to failure and
       subsequent repair or alterations of (virtualized) hardware/software, our
       software product will automatically attempt to contact our online licensing
       systems to renegotiate the licensing state. On any given license key, you
       are limited to three (3) automatic renegotiations within the license key
       lifetime. After these renegotiations are exhausted, the license key is
       considered invalid, and the activation state will be locked to the last
       valid system configuration it was activated on. OpenVPN Inc.reserves the
       right to grant exceptions to this policy for license holders under
       extenuating circumstances, and such exceptions can be requested through a
       ticket via the OpenVPN Access Server ticketing system.
    9. Once an activated license key expires or becomes invalid, the concurrency
       limit on our software product will decrease by the amount of concurrent
       connections previously granted by the license key. If all of your purchased
       license key(s) have expired, the product will revert to demonstration mode,
       which allows a maximum of two (2) concurrent users to be connected to your
       server. Prior to your license expiration date(s), OpenVPN Inc. will attempt
       to remind you to renew your license(s) by sending periodic email messages
       to the licensee email address on record. You are solely responsible for
       the timely renewal of your license key(s) prior to their expiration if
       continued operation is expected after the license expiration date(s).
       OpenVPN Inc. will not be responsible for any misdirected and/or undeliverable
       email messages, nor does it have an obligation to contact you regarding
       your expiring license keys.
   10. Any valid license key holder is entitled to use our ticketing system for
       support questions or issues specifically related to the OpenVPN Access
       Server product. To file a ticket, go to our website at http://openvpn.net/
       and sign in using the account that was registered and used to purchase the
       license key(s). You can then access the support ticket system through our
       website and submit a support ticket. Tickets filed in the ticketing system
       are answered on a best-effort basis. OpenVPN Inc. staff
       reserve the right to limit responses to users of our demo / expired
       licenses, as well as requests that substantively deviate from the OpenVPN
       Access Server product line. Tickets related to the open source version of
       OpenVPN will not be handled here.
   11. Purchasing a license key does not entitle you to any special rights or
       privileges, except the ones explicitly outlined in this user agreement.
       Unless otherwise arranged prior to your purchase with OpenVPN,
       Inc., software maintenance costs and terms are subject to change after your
       initial purchase without notice. In case of price decreases or special
       promotions, OpenVPN Inc. will not retrospectively apply
       credits or price adjustments toward any licenses that have already been
       issued. Furthermore, no discounts will be given for license maintenance
       renewals unless this is specified in your contract with OpenVPN Inc.

Please enter 'yes' to indicate your agreement [no]: yes

Once you provide a few initial configuration settings,
OpenVPN Access Server can be configured by accessing
its Admin Web UI using your Web browser.

Will this be the primary Access Server node?
(enter 'no' to configure as a backup or standby node)
> Press ENTER for default [yes]: yes

Please specify the network interface and IP address to be
used by the Admin Web UI:
(1) all interfaces: 0.0.0.0
(2) eth0: 172.31.16.206
Please enter the option number from the list above (1-2).
> Press Enter for default [2]: 1

Please specify the port number for the Admin Web UI.
> Press ENTER for default [943]: 943

Please specify the TCP port number for the OpenVPN Daemon
> Press ENTER for default [443]: 443

Should client traffic be routed by default through the VPN?
> Press ENTER for default [yes]: yes

Should client DNS traffic be routed by default through the VPN?
> Press ENTER for default [yes]: yes

Use local authentication via internal DB?
> Press ENTER for default [yes]: yes

Private subnets detected: ['172.31.0.0/16']

Should private subnets be accessible to clients by default?
> Press ENTER for EC2 default [yes]: yes

To initially login to the Admin Web UI, you must use a
username and password that successfully authenticates you
with the host UNIX system (you can later modify the settings
so that RADIUS or LDAP is used for authentication instead).

You can login to the Admin Web UI as "openvpn" or specify
a different user account to use for this purpose.

Do you wish to login to the Admin UI as "openvpn"?
> Press ENTER for default [yes]: yes

> Please specify your OpenVPN-AS license key (or leave blank to specify later):

Initializing OpenVPN...
Adding new user login...
useradd -s /sbin/nologin "openvpn"
Writing as configuration file...
Perform sa init...
Wiping any previous userdb...
Creating default profile...
Modifying default profile...
Adding new user to userdb...
Modifying new user as superuser in userdb...
Getting hostname...
Hostname: openvpnserver
Preparing web certificates...
Getting web user account...
Adding web group account...
Adding web group...
Adjusting license directory ownership...
Initializing confdb...
Generating init scripts...
Generating PAM config...
Generating init scripts auto command...
Starting openvpnas...

NOTE: Your system clock must be correct for OpenVPN Access Server
to perform correctly.  Please ensure that your time and date
are correct on this system.

Initial Configuration Complete!

You can now continue configuring OpenVPN Access Server by
directing your Web browser to this URL:

https://x.x.x.x:943/admin
Login as "openvpn" with the same password used to authenticate
to this UNIX host.

During normal operation, OpenVPN AS can be accessed via these URLs:
Admin  UI: https://x.x.x.x:943/admin
Client UI: https://x.x.x.x:943/

See the Release Notes for this release at:
   https://openvpn.net/vpn-server-resources/release-notes/
- Now you we need a password to login first time as an admin. For that run command
openvpnas@openvpnas2:~$ sudo passwd openvpn
Enter new UNIX password:
Retype new UNIX password:
passwd: password updated successfully
openvpnas@openvpnas2:~$
You are done with basic setup, we can now proceed with the web UI for further settings.
Step 4 : Accessing OpenVPN Web UI :
Now we will access the OpenVPN Web UI using the elastic IP with url https://x.x.x.x:943/admin where x.x.x.x is your elasic IP. You might be thinking that we have vpn.yourdomain.com setup so why are we using the elastic IP? We will get back to it shortly but for the first time we will need to use the IP.
- Visit https://x.x.x.x:943/admin which will say that it is insecure, click on advanced and proceed to visit the website

- Login with the username
openvpnand the admin password you set earlier - Once you login for the first time, you will see a lisence agreement which you select
agree
- Now you will see a nice web UI as below :
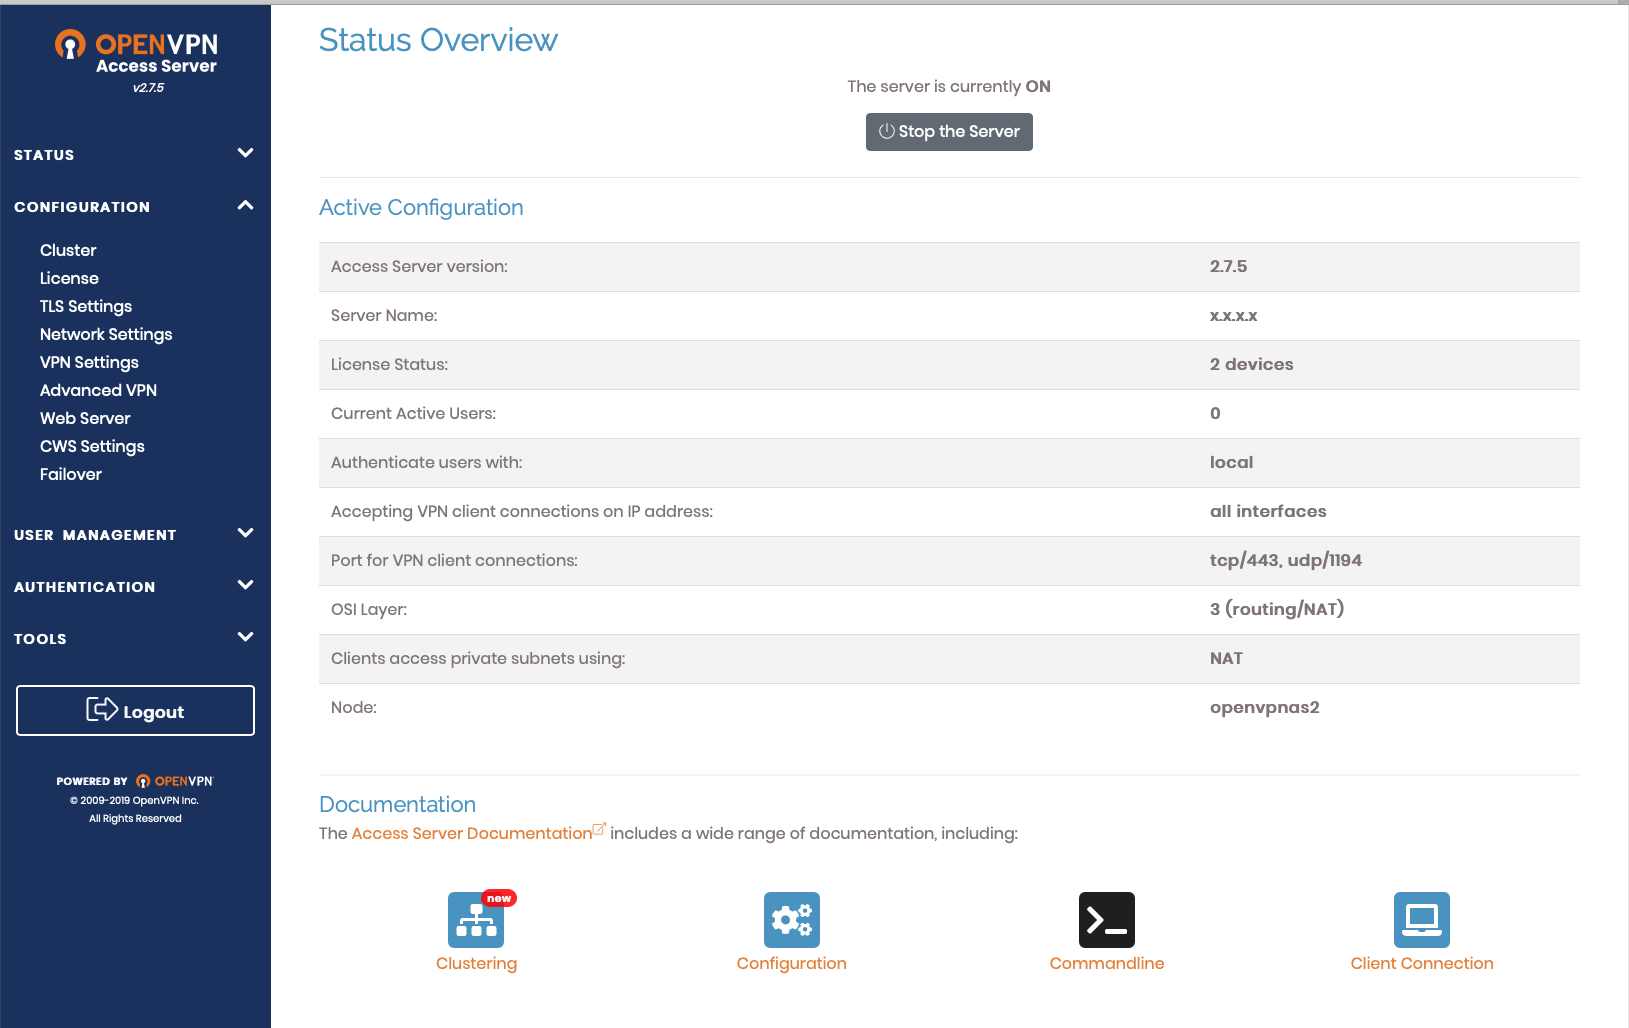
- Go to
Configuration > Network Settingson the left hand side menu - You will see a setting
Hostname or IP Address. Here we will now entervpn.yourdomain.com - Now click on
Save Settings - Now click on
Update running server
Now we have the domain set up. You can open another tab and visit https://vpn.yourdomain.com:943/admin and it will work now!
Step 5 : Having a valid SSL :
You must have observed that the SSL comes with the OpenVPN server is not trusted by browsers. So we will have a new CertBot SSL which will not show SSL warnings and errors.
- SSH to the openvpn server again
- Type following commands to install certbot
sudo apt-get update
sudo apt-get install software-properties-common
sudo add-apt-repository universe
sudo add-apt-repository ppa:certbot/certbot
sudo apt-get update
sudo apt-get install -y certbot
Now we need to open port 80 temporarily on the security group of our OpenVPN server so that Certbot can verify that the server and domain. Certbot will temporarily spin up a webserver on our openVPN machine for the same.
- Go to AWS console and choose our OpenVPN server security group OpenVPN server SG
- In the inbound rules, add HTTP 80 rule with source 0.0.0.0/0, ::/0 to access tempoarary port 80 traffic
Now we can run Certbot
- SSH to the openvpn server again
- Type following commands to request certbot certificate
sudo certbot certonly --standalone
It will ask you number of questions and then a domain name. Enter vpn.yourdomain.com and it will verify it using temporary web server on port 80.
Below is the output :
openvpnas@openvpnas2:~$ sudo certbot certonly --standalone
Saving debug log to /var/log/letsencrypt/letsencrypt.log
Plugins selected: Authenticator standalone, Installer None
Enter email address (used for urgent renewal and security notices) (Enter 'c' to
cancel): support@yourdomain.com

- - - - - - - - - - - - - - - - - - - - - - - - - - - - - - - - - - - - - - - -
Please read the Terms of Service at
https://letsencrypt.org/documents/LE-SA-v1.2-November-15-2017.pdf. You must
agree in order to register with the ACME server at
https://acme-v02.api.letsencrypt.org/directory
- - - - - - - - - - - - - - - - - - - - - - - - - - - - - - - - - - - - - - - -
(A)gree/(C)ancel: A

- - - - - - - - - - - - - - - - - - - - - - - - - - - - - - - - - - - - - - - -
Would you be willing to share your email address with the Electronic Frontier
Foundation, a founding partner of the Let's Encrypt project and the non-profit
organization that develops Certbot? We'd like to send you email about our work
encrypting the web, EFF news, campaigns, and ways to support digital freedom.
- - - - - - - - - - - - - - - - - - - - - - - - - - - - - - - - - - - - - - - -
(Y)es/(N)o: N
Please enter in your domain name(s) (comma and/or space separated)  (Enter 'c'
to cancel): vpn.yourdoman.com
Obtaining a new certificate
Performing the following challenges:
http-01 challenge for vpn.yourdoman.com
Waiting for verification...
Cleaning up challenges

IMPORTANT NOTES:
 - Congratulations! Your certificate and chain have been saved at:
   /etc/letsencrypt/live/vpn.youdomain.com/fullchain.pem
   Your key file has been saved at:
   /etc/letsencrypt/live/vpn.youdomain.com/privkey.pem
   Your cert will expire on 2020-01-14. To obtain a new or tweaked
   version of this certificate in the future, simply run certbot
   again. To non-interactively renew *all* of your certificates, run
   "certbot renew"
 - If you like Certbot, please consider supporting our work by:
Now we are concerned with 2 files : privkey.pem and fullchain.pem. But first, go back to the security group and remove the rule for HTTP port 80 as we do not need it anymore!
Now we will view contents of these files and copy them locally. You can use following commands to show their text content, you need to manually copy them and make new files locally with same name and paste the respective contents.
# Make sure you replace vpn.youdomain.com with your expected domain or ip
cat /etc/letsencrypt/live/vpn.youdomain.com/fullchain.pem
cat /etc/letsencrypt/live/vpn.youdomain.com/privkey.pem
Final step is to update these certificates on OpenVPN web UI.
- Visit https://vpn.yourdomain.com:943/admin and login with the admin credentials used earlier
- Go to Configuration > Web Server on the left hand side menu
- You will 3 file upload options fot uploading certifiates
- Upload local fullchain.pem for Certificate file upload
- Upload local privkey.pem for Private Key file upload
- Click on Validate and you will see new certificate results under Validation Results
- Now click on Save
- Click on Update running server if it pops up
And now you are done! Logout and login again or a new tab and you will see that new SSL works with no certificate warnings.
Step 6 : Creating an OpenVPN user :
You should never ever use the admin user openvpn to connect via vpn client! We will now create a new user.
- Visit
https://vpn.yourdomain.com:943/adminand login with the admin credentials used earlier - Go to
User Management > User Permissionson the left hand side menu - Enter new username
vpnclientuserand click onMore SettingsDropdown to set a new passsword - Click on
Save SettingsandUpdate existing server
Final step : Login with VPN :
Go to your VPN client and enter host as vpn.yourdomain.com with username as vpnclientuser and the password you set for it. And Done!! You are connected.
If you do not have VPN client follow below steps :
- Visit
https://vpn.yourdomain.com:943(Note that this url is not the admin login but a user login without /admin at the end) - Login with the user credentials with username as
vpnclientuserand the password you set for it - Now you will see options to download VPN client or reset the user password if needed
Cleanup :
Now you are done with the OpenVPN server setup. I would recommend to remove the HTTP 22 inbound rule from OpenVPN server SG security group associated with the VPN server. This is because you would only need SSH access when you want to check logs or update some setup on OpenVPN. You can always go to AWS and open the port when needed.
Alternatively, change the source to your specific IP from which you SSH to the instance so that it is not open to the whole wide internet.